Are you tired of dealing with slow and unreliable internet connections? Are you looking for a solution that will bring fast and reliable internet directly to your home? Look no further than Starlink—a groundbreaking satellite internet system developed by SpaceX. With Starlink, you can finally escape the confines of traditional internet providers and enjoy lightning-fast speeds no matter where you are located. In this article, we will guide you through the process of installing Starlink on your roof, ensuring that you can make the most of this revolutionary technology and bid farewell to frustrating internet woes. So, let’s dive in and learn how to bring the stars to your roof!
Preparing Your Roof for Starlink Installation
Before installing Starlink on your roof, it is crucial to prepare the area properly to ensure a smooth and successful installation. Taking the time to assess and address any potential issues beforehand can save you from future headaches and ensure optimal performance of your Starlink connection.
Firstly, you need to inspect your roof to ensure it is in good condition and can support the weight of the Starlink dish. Look for any signs of damage, such as missing or cracked tiles, leaks, or weakened structures. It is essential to fix any existing issues before proceeding with the installation to avoid any further damage or complications.
Furthermore, you need to consider the placement of the dish on your roof to achieve the best possible signal reception. Ideally, choose a location that has a clear line of sight to the sky, free from obstructions like trees, buildings, or other structures. This will help ensure a strong and reliable connection.
Next, gather the necessary tools and equipment for the installation process. These may include a ladder, screwdrivers, wrenches, mounting brackets, and appropriate hardware. It is crucial to have everything ready before starting the installation to prevent any delays or interruptions.
Lastly, prioritize safety during the installation process. Working on your roof can be hazardous, so take proper precautions to protect yourself. Use appropriate safety gear, such as a harness and non-slip shoes, and always exercise caution when climbing and maneuvering on the roof.
By preparing your roof before installing Starlink, you can lay a solid foundation for a reliable and high-performing internet connection. Taking the time to inspect, address any issues, choose the ideal location, gather the necessary tools, and prioritize safety will help ensure a successful installation process.
Choosing the Ideal Location on Your Roof for Starlink
When it comes to installing Starlink on your roof, choosing the right location is crucial for optimal performance. The ideal location should have a clear line of sight to the sky and minimal obstruction from trees, buildings, or other objects. Additionally, you’ll want to consider factors such as the angle of the roof, accessibility, and proximity to power outlets.
To determine the best spot on your roof for Starlink installation, start by surveying your property from different angles. Look for a location that offers a clear and unobstructed view of the sky, preferably facing towards the southern hemisphere. This will ensure that the Starlink satellite dish can communicate effectively with the satellite constellation in orbit.
Next, take into account the angle of your roof. Starlink recommends mounting the dish on a roof with a pitch between 40 and 60 degrees. This allows for better connectivity and reduces the risk of signal interference. A flatter roof angle may result in a compromised signal, while a steeper angle could make installation more challenging.
Accessibility is another important factor to consider. Choose a location on your roof that is easily accessible for installation and future maintenance. Avoid areas that require climbing up dangerous heights or require special equipment to reach. It’s also important to ensure that the area is stable and can support the weight of the Starlink equipment without any risk of damage or structural compromise.
Proximity to power outlets should also be taken into account. The Starlink equipment requires a power source, so it’s essential to choose a location that is within reach of an electrical outlet. If necessary, you may need to consult with an electrician to ensure proper wiring and safe installation.
In summary, when selecting the ideal location on your roof for Starlink installation, consider factors such as unobstructed sky view, roof angle, accessibility, and proximity to power outlets. By choosing the right spot, you’ll set the foundation for a successful and reliable Starlink connectivity experience.
Gathering the Necessary Tools and Equipment for Starlink Installation
:
Before you begin installing Starlink on your roof, it’s important to gather all the necessary tools and equipment to ensure a smooth and efficient installation process. By having everything you need on hand, you can avoid unnecessary delays and frustration. Here are the essential items you’ll need:
1. Ladder: A sturdy ladder is a must-have tool when it comes to roof installations. Make sure it is tall enough to reach your roof safely and securely. Consider using a ladder stabilizer or stand-off to provide additional stability and prevent damage to your roof.
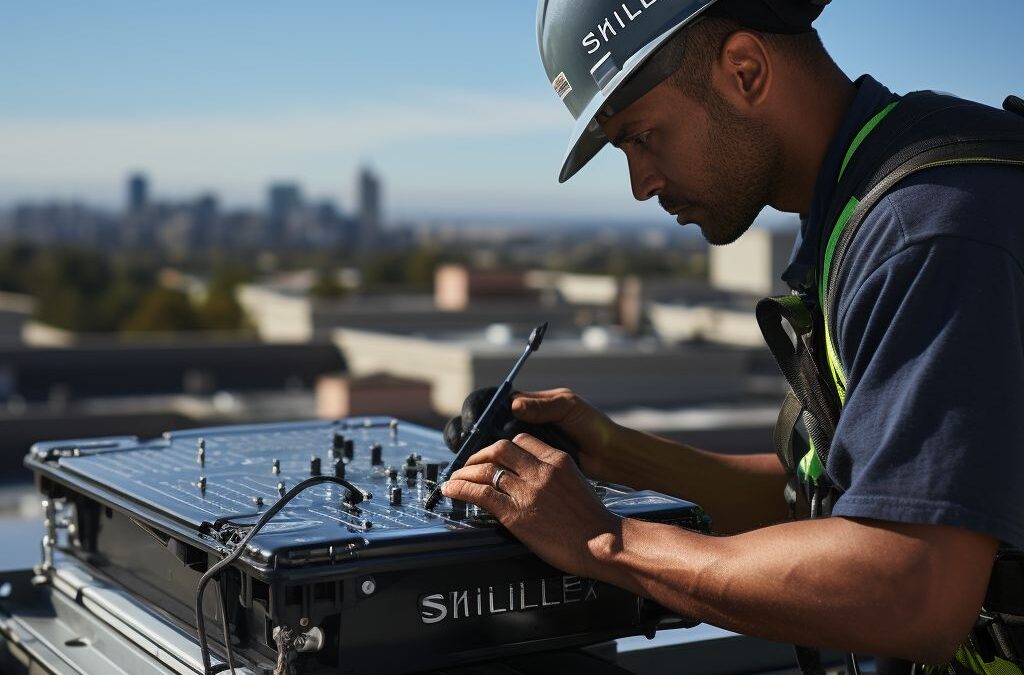
2. Safety Gear: Safety should always be a top priority during any installation. Wear appropriate safety gear, including a hard hat, non-slip shoes, and work gloves. Additionally, consider using safety harnesses or fall protection systems if needed, especially for steep roofs.
3. Drill and Bits: A high-quality drill with the appropriate drill bits is essential for installing Starlink. You’ll need to drill holes for mounting brackets, cable entry points, and other necessary fixtures. Ensure you have a variety of drill bits suitable for different materials, such as wood or metal.
4. Screwdriver Set: A set of screwdrivers, including both flathead and Phillips head, will be needed to secure various components during the installation process. Ensure you have a range of sizes to accommodate different screw types and sizes.
5. Sealing Materials: To maintain the integrity of your roof and protect against water damage, you’ll need sealing materials. Silicone or roof sealant can be used to seal any holes or cable entry points, ensuring a watertight seal.
6. Cable Management Accessories: As you connect the Starlink components and route cables, cable management accessories such as cable ties or clips will come in handy. These will help keep cables neat, organized, and securely in place.
7. Smartphone or Tablet: You’ll need a smartphone or tablet to complete the Starlink installation process. The Starlink app is used to set up and configure your Starlink network, align the dish, and check the signal strength. Ensure your device is compatible with the app and has a reliable internet connection.
Remember to always follow the manufacturer’s instructions and safety guidelines when using tools and equipment. Having these tools and equipment readily available will make the process of installing Starlink on your roof much smoother and more efficient, reducing the chances of delays or complications.
Step-by-Step Guide to Installing Starlink on Your Roof
Installing Starlink on your roof requires careful preparation and attention to detail. In this step-by-step guide, we will walk you through the process of setting up Starlink on your roof for optimal performance.
First, gather all the necessary tools and equipment for the installation. You will need a ladder, a power drill, mounting brackets, screws, a wrench, and a cable management solution. Make sure you have all these items readily available before you begin.
Next, determine the ideal location on your roof for installing Starlink. Look for an area that has a clear line of sight to the sky, free from obstacles such as trees or tall buildings. This will ensure maximum signal strength and minimize potential interference.
Once you have chosen the location, begin by attaching the mounting brackets to your roof. Use the power drill and screws to secure the brackets firmly in place. Make sure they are level and stable before proceeding.
After the mounting brackets are installed, carefully attach the Starlink dish to the brackets. Follow the manufacturer’s instructions for proper alignment and positioning. Use a wrench to securely tighten the dish in place, ensuring it is pointing towards the sky at the correct angle.
Once the dish is properly installed, it’s time to connect the cables. Begin by running the provided ethernet cable from the dish to the interior of your home. Use a cable management solution to keep the cables organized and protected from the elements.
Inside your home, connect the ethernet cable to the Starlink router or modem. This will provide internet connectivity to your devices. Ensure that the connection is secure and stable.
Finally, power on the Starlink system and wait for it to establish a connection. This may take a few minutes, so be patient. Once the connection is established, you should have reliable internet access via Starlink.
Remember to periodically check the alignment and position of the dish to ensure optimal performance. Over time, weather conditions or other factors may shift the dish slightly, affecting signal strength.
Installing Starlink on your roof may require some time and effort, but it is a worthwhile investment for reliable internet connectivity. By following this step-by-step guide, you can successfully set up Starlink and enjoy high-speed internet access wherever you are.
Ensuring Proper Connectivity and Alignment for Optimal Starlink Performance
To fully optimize the performance of your Starlink internet system, it is crucial to ensure proper connectivity and alignment. This will enable you to harness the full potential of the satellite network and experience fast and reliable internet speeds. Follow these steps to guarantee optimal connectivity and alignment for your Starlink installation.
First, make sure that your Starlink dish is placed in an area with a clear line of sight to the sky. Avoid obstructions such as trees, neighboring buildings, or other structures that may obstruct the satellite signal. This will help prevent any interference that could negatively impact your internet connection.
Next, check the elevation and azimuth angles of your Starlink dish. These angles determine the direction in which your dish should be pointed to establish a reliable connection with the Starlink satellite constellation. You can easily find the optimal elevation and azimuth angles for your location by referring to the Starlink app or website. Align your dish accordingly to ensure the best possible signal reception.
To further enhance connectivity, it is recommended to utilize high-quality coaxial cables for the connection between your Starlink dish and router. Poor-quality or damaged cables can lead to signal loss, reducing the overall performance of your internet connection. Consider using shielded and low-loss coaxial cables to minimize any potential interference.
Additionally, keep your Starlink dish clean and free from any debris, dust, or snow accumulation. Regularly inspect and clean the dish surface to maintain an unobstructed signal reception. Snow or ice buildup can significantly impact the performance of your Starlink system, so be proactive in clearing any winter precipitation.
Lastly, periodically perform speed tests and check your signal strength using the Starlink app or other reliable internet speed testing tools. This will help you monitor the performance of your connection and identify any potential issues promptly. If you notice a decline in performance, it may be necessary to reposition or realign your dish to optimize connectivity.
By following these steps to ensure proper connectivity and alignment for your Starlink installation, you can maximize the performance and reliability of your internet connection. Enjoy the benefits of fast and seamless internet access provided by the Starlink satellite network.
Troubleshooting Common Issues During Starlink Installation
During the installation process of Starlink on your roof, you may encounter some common issues that can hinder the optimal performance of the system. It is essential to address these problems promptly to ensure a seamless and reliable connection. This section will provide helpful solutions for troubleshooting these common issues.
One common problem that may arise during Starlink installation is poor signal strength. This can occur due to various factors such as obstructions, interference from neighboring structures or devices, or incorrect alignment. To troubleshoot this issue, you can start by checking for any physical obstructions such as trees, tall buildings, or other obstacles that may be obstructing the satellite’s line-of-sight. If possible, consider repositioning the Starlink satellite dish to a location with a clearer view of the sky.
Additionally, interference from nearby devices can impact the signal strength of your Starlink connection. Ensure that the dish is placed away from any electronic devices that may emit strong electromagnetic signals, such as Wi-Fi routers or Bluetooth devices. This may require some experimentation to find the best position that minimizes interference.
While aligning the Starlink dish, it is crucial to follow the manufacturer’s instructions carefully. A misaligned dish can result in lower signal strength and slower speeds. Use a quality signal strength meter or rely on the built-in tools provided by Starlink to accurately align the dish for optimal performance. Adjust the azimuth and elevation angles as instructed, and ensure the dish is securely mounted to prevent any movement or misalignment caused by external factors such as strong winds.
In some cases, despite troubleshooting efforts, you may still experience connectivity issues with your Starlink system. If all else fails, consider reaching out to the Starlink customer support team for further assistance. They can provide guidance specific to your unique situation and may be able to identify any other underlying technical issues that could be causing the problem.
Remember, requires patience and attention to detail. By addressing these problems promptly and effectively, you can enjoy a reliable and high-speed internet connection courtesy of Starlink on your roof.
People Also Ask
How much does it cost to install Starlink on a roof?
The cost to install Starlink on a roof currently amounts to $499, which includes the Starlink Kit and the necessary equipment for installation. This price does not include any additional accessories or potential professional installation fees.
What equipment do I need to install Starlink on my roof?
To install Starlink on a roof, you will need the Starlink Kit, which includes a satellite dish, a mounting tripod, and a Wi-Fi router. You will also require a clear view of the sky, an internet service subscription, and a smartphone or computer to set up the system.
Can I install Starlink on my own or do I need professional help?
Starlink is designed to be a self-installation system, and detailed instructions are provided to guide users through the installation process. However, if you are not comfortable with setting up the equipment yourself, you can also choose to hire a professional to assist you with the installation.
What are the requirements for roof installation of Starlink?
In order to install Starlink on your roof, you will need to have a suitable mounting location that provides a clear view of the sky without obstructions. Your roof should be capable of safely supporting the satellite dish and mounting tripod. Additionally, you will need an internet service subscription and a device to connect the system to.
Is it possible to move the Starlink dish after installation?
Yes, it is possible to move the Starlink dish after initial installation. However, it is important to note that the dish requires a clear line of sight to the sky, so moving it to a location with obstructions may result in degraded performance or loss of connectivity. Starlink recommends avoiding frequent or unnecessary moves of the dish.
In Summary
In conclusion, installing Starlink on your roof can be a relatively simple process if you follow the recommended steps and guidelines provided by the company. By taking the necessary precautions and ensuring you have a clear view of the sky, you can enjoy high-speed internet connectivity in remote areas.
Remember to gather all the required equipment, including the Starlink kit and a stable mounting structure for the satellite dish. Take into consideration any local regulations or permits that may be required for installing equipment on your roof.
Once you have identified the optimal location for the dish, carefully mount it and secure it in place. Follow the provided instructions to connect the cables and ensure a proper alignment with the satellites. After the physical installation is complete, perform the necessary setup and configuration steps using the Starlink app or website.
By following these steps and adhering to the guidelines, you can successfully install Starlink on your roof and experience the benefits of reliable and fast internet connectivity, even in remote areas.
Start enjoying the benefits of Starlink today by installing it on your roof and joining the ever-growing network of users who have embraced this innovative technology. Discover a new level of internet access and connectivity that is changing the way we stay connected and bridging the digital divide.

Alexander Johnson is a seasoned roofing professional with over 25 years in the industry and CEO at Fresno Roof Repair. His expertise blends traditional craftsmanship with cutting-edge technology, focusing on resilient roofing solutions tailored to Fresno’s diverse climate. As a leader at Fresno Roof Repair, Alexander emphasizes open communication, teamwork, and continual education, ensuring every client receives exceptional service. Beyond his role, Alexander is deeply committed to the Fresno community, supporting local initiatives. His dedication, technical proficiency, and customer-centric approach make him an invaluable asset to Fresno Roof Repair, embodying the company’s commitment to excellence and quality roofing solutions.