If you’re a homeowner thinking about replacing your roof, or a DIY enthusiast eager to take on a new project, understanding the importance of proper roof sheathing installation is key. Roof sheathing plays a critical role in supporting your roof covering and protecting your home from the elements. Whether you’re replacing damaged sheathing or installing it as part of a new roof, mastering the installation process is crucial for ensuring a durable and long-lasting roof. In this article, we will walk you through the step-by-step process of installing roof sheathing, providing you with all the necessary guidance to tackle this task with confidence. Let’s get started and ensure your roof is protected for years to come!
Types of Roof Sheathing: Understanding Your Options
Understanding the different types of roof sheathing is crucial when it comes to installing or repairing your roof. Roof sheathing serves as the foundation for the rest of your roof, providing structural support and helping to distribute the weight evenly. There are several options available when it comes to roof sheathing, each with its own advantages and considerations.
One common type of roof sheathing is plywood. Plywood is made by gluing together thin layers of wood veneer, creating a strong and durable sheet. It is often used in residential construction due to its affordability and availability. Plywood typically comes in 4 by 8-foot sheets and is available in various thicknesses. It is important to choose the right thickness of plywood based on the span of your roof rafters to ensure proper support.
Another option for roof sheathing is oriented strand board (OSB). OSB is made by compressing small wood strands with adhesive, creating a sturdy and cost-effective material. OSB is often used as a substitute for plywood due to its lower cost and uniform composition. It is important to note that OSB may not be as moisture-resistant as plywood, so proper ventilation and insulation are crucial to prevent moisture damage.
In addition to plywood and OSB, there are other specialized roof sheathing options available such as fiberboard, metal panels, and composite materials. Fiberboard is a lightweight option that provides good insulation properties. Metal panels, such as aluminum or steel, are often used in commercial or industrial buildings for their durability and fire resistance. Composite materials offer a combination of different materials, such as wood fiber and plastic, for enhanced strength and moisture resistance.
When choosing the right type of roof sheathing, consider factors such as the climate in your area, the load capacity of your roof, and your budget. It is also important to consult local building codes and regulations to ensure compliance. Understanding the different options for roof sheathing will help you make an informed decision and ensure a successful roof installation or repair.
Assessing Your Roof Structure: Determining the Need for Sheathing Installation
Before diving into the process of installing roof sheathing, it is important to assess the condition of your roof structure and determine if sheathing installation is necessary. This step is crucial to ensure that your roof has the necessary support and stability to withstand the weight of the roofing materials and any potential environmental stresses.
One of the key factors to consider when assessing your roof structure is the age of your home. Older homes may not have been built with modern standards and may require additional structural support. Additionally, if your roof has experienced any significant damage or deterioration, sheathing installation may be necessary to reinforce the structure.
Another important aspect to evaluate is the current condition of your roof deck. If you are experiencing leaks or other signs of water damage, it could be an indicator that your roof sheathing is compromised. Inspect for any signs of rot, sagging, or warping, as these are red flags that sheathing installation may be needed.
Additionally, consider the type of roofing materials you plan to use. Certain materials, such as slate or tile, require a sturdier support system and may necessitate the installation of additional sheathing. Understanding these factors will guide your decision on whether or not to proceed with sheathing installation.
In conclusion, assessing the condition of your roof structure is an essential step in determining the need for sheathing installation. By carefully inspecting the age of your home, the current condition of the roof deck, and the type of roofing materials you plan to use, you can make an informed decision on whether or not sheathing installation is necessary to ensure the longevity and stability of your roof.
Preparation and Safety Measures: Ensuring a Smooth Installation Process
Before starting the installation of roof sheathing, it is crucial to take the necessary preparation and safety measures to ensure a smooth and successful process. These measures not only help protect you and your team but also ensure the longevity and stability of the roof structure.
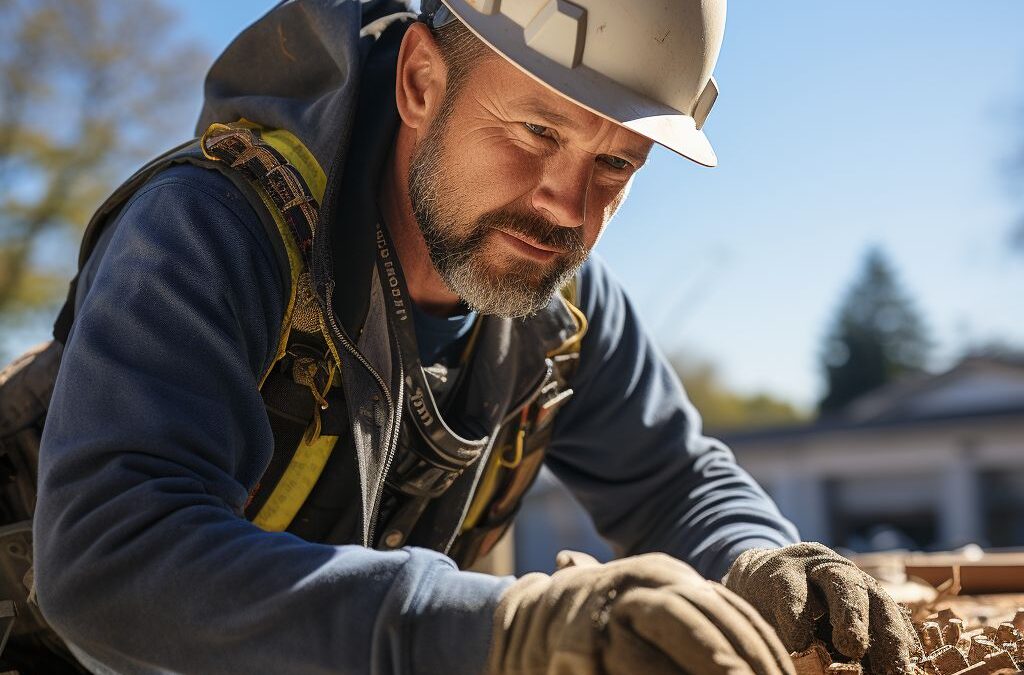
First and foremost, make sure to wear appropriate safety gear, including gloves, safety glasses, and a hard hat. Working on a roof can be hazardous, so protecting yourself is essential. Additionally, always use a sturdy and reliable ladder or scaffolding system to access the roof safely.
Before installing roof sheathing, it’s crucial to properly inspect the existing roof structure. Check for any signs of damage or weakness, such as rot, sagging, or insect infestation. If you notice any issues, address them before proceeding with the installation, as they can affect the structural integrity of the roof.
Next, ensure the work area is clear of debris and other obstacles that could pose a safety risk. Remove any loose shingles, nails, or other materials that could interfere with the sheathing installation process. It’s also advisable to cover any delicate surfaces, such as skylights or windows, to protect them from potential damage during the installation.
Moreover, ensure the weather conditions are suitable for the installation. Installing roof sheathing in extreme temperatures or adverse weather conditions can lead to subpar results and potential safety hazards. Avoid working during rain, strong winds, or extreme heat to ensure optimal installation conditions.
Lastly, gather all the necessary tools and materials needed for the installation. This may include a circular saw, roofing nails or screws, a nail gun, measuring tape, and a chalk line. Having everything ready and easily accessible will save time and streamline the installation process.
By taking these preparation and safety measures, you can minimize the risks associated with installing roof sheathing and ensure a smooth and efficient process. Remember, safety should always be a top priority when working on any construction project.
Step-by-Step Guide: Installing Roof Sheathing Properly
Installing roof sheathing is an important step in the roof repair process that provides stability and support to your roof structure. Follow this step-by-step guide to ensure a proper installation that will help prolong the life of your roof.
1. Start by measuring and cutting the sheathing panels to fit the size and shape of your roof. It is important to use the correct measurements to ensure a precise fit and avoid gaps that could lead to leaks or weak points in the roof.
2. Before installing the sheathing, make sure the roof deck is clean and free of debris. Remove any nails or staples that may be sticking out, as they can interfere with the installation process.
3. Begin at one corner of the roof and position the first sheathing panel, making sure to align it with the edge of the roof. Secure the panel using nails or screws, spaced according to manufacturer recommendations. Repeat this process for the remaining panels, overlapping them slightly to create a solid, continuous surface.
4. Pay attention to the panel orientation to ensure proper installation. The long edges of the sheathing should run parallel to the roof slope, while the short edges should be perpendicular to the roof trusses or rafters.
5. To further enhance the strength and durability of the roof, consider adding adhesive between the sheathing panels. This will create a stronger bond and help prevent any potential movement or shifting of the panels.
6. As you install the sheathing, be mindful of any gaps or voids that might occur between the panels. These areas can weaken the roof and allow moisture to seep in. Fill any gaps with the appropriate sealant to ensure a watertight and secure roof.
7. Finally, trim any excess sheathing material along the roof edges for a clean and professional finish. This will prevent any potential hazards or damage caused by loose or protruding edges.
By following these step-by-step instructions, you can ensure a proper installation of roof sheathing that will contribute to the overall strength and longevity of your roof. Taking the time to install the sheathing correctly will provide a solid foundation for the rest of your roofing system and help protect your home from the elements for years to come.
Choosing the Right Fasteners: Enhancing the Strength and Durability of Your Roof
When it comes to installing roof sheathing, choosing the right fasteners is crucial for ensuring the strength and durability of your roof. The fasteners you use to secure the sheathing to the roof structure can greatly impact the overall performance and longevity of your roof.
First and foremost, you need to consider the type of roof sheathing you are installing. Different sheathing materials require different types of fasteners. For example, plywood sheathing typically requires galvanized roofing nails, while oriented strand board (OSB) sheathing may necessitate screws or ring-shank nails. It is essential to consult the manufacturer’s recommendations for the appropriate fasteners to use with the specific type of sheathing you are installing.
In addition to choosing the appropriate type of fasteners, you should also consider their size and length. The size of the fasteners should be compatible with the thickness of the sheathing material to ensure a secure and stable installation. Using fasteners that are too short may not provide enough hold and could lead to loose or sagging sheathing over time. On the other hand, fasteners that are too long may penetrate too deeply into the roof structure and compromise the integrity of the roof.
Furthermore, it is important to use fasteners that are resistant to corrosion. Roof sheathing is constantly exposed to the elements, including rain, snow, and UV rays. As a result, using fasteners with high corrosion resistance, such as galvanized or stainless-steel nails or screws, can help prevent rust and maintain the strength and durability of your roof over time.
Remember to follow the manufacturer’s instructions for fastener spacing and placement. Properly spaced and evenly distributed fasteners can evenly distribute the load and minimize the risk of sheathing failure. This is particularly important in areas prone to strong winds or heavy snow loads.
By choosing the right fasteners for your roof sheathing installation, you can enhance the structural integrity and durability of your roof. Don’t underestimate the importance of investing in high-quality fasteners that are compatible with the specific type of sheathing you are using. Taking the time to select the right fasteners will ensure a strong and long-lasting roof that can withstand the tests of time and weather.
Common Mistakes to Avoid: Tips for a Successful Roof Sheathing Installation
When installing roof sheathing, there are several common mistakes that can be easily avoided with proper planning and attention to detail. These mistakes can have a significant impact on the overall strength and durability of your roof, so it’s important to take the time to do the job right. Here are a few tips to help you avoid these common pitfalls and ensure a successful roof sheathing installation.
One of the most common mistakes made during roof sheathing installation is using the wrong type of fasteners or not using enough of them. It’s crucial to select fasteners that are specifically designed for roof sheathing and are appropriate for the type of roof you have. Using the wrong fasteners can lead to weakened connections and may result in the sheathing becoming loose or even detaching from the roof structure.
Another common mistake is failing to properly stagger the sheathing panels. Staggering the panels means offsetting the seams between each row of sheathing, which helps to distribute the weight evenly across the roof and minimizes the risk of roof leaks. Failing to stagger the panels can create weak points in the roof and leave it vulnerable to damage from wind, rain, and snow.
Improper nailing technique is another frequent mistake made during roof sheathing installation. It’s important to use the correct nailing pattern and depth to ensure a secure and tight fit. Nail guns should be set to the appropriate pressure to avoid overdriving or underdriving the nails. Overdriving can damage the sheathing or create gaps, while underdriving can leave the sheathing loose and prone to movement.
Lastly, neglecting proper ventilation is a mistake that can have long-term consequences for your roof. Proper ventilation is essential for preventing moisture buildup and reducing the risk of rot and decay. Without adequate ventilation, the sheathing can become warped, leading to potential issues with the roof structure and its overall performance.
In conclusion, avoiding common mistakes during roof sheathing installation is crucial for the long-term strength and durability of your roof. By selecting the right fasteners, properly staggering the sheathing panels, using the correct nailing technique, and ensuring proper ventilation, you can ensure a successful installation that will protect your roof for years to come. Remember to always follow manufacturer guidelines and seek professional help if needed to ensure the best results.
People Also Ask
What materials are needed to install roof sheathing?
To install roof sheathing, you will need materials such as plywood or oriented strand board (OSB), roof felt or synthetic underlayment, roofing nails, a circular saw or handsaw, a measuring tape, and a hammer or nail gun.
How do you prepare the roof for sheathing installation?
To prepare the roof for sheathing installation, start by inspecting the roof structure for any damage or rotten areas that need to be repaired. Then, install roof drip edge along the eaves, followed by applying a layer of roofing felt or synthetic underlayment to provide an additional moisture barrier and protect the sheathing.
What is the recommended spacing for roof sheathing?
The recommended spacing for roof sheathing is typically 1/8 inch between panels to allow for expansion due to changes in temperature and humidity. It is important to follow the manufacturer’s guidelines regarding specific spacing requirements for the type of sheathing material being used.
How should roof sheathing be installed?
Roof sheathing should be installed starting at one corner of the roof and working your way across. Begin by aligning the first panel with the edge of the roof and leave a 1/8-inch gap between the panels. Secure each panel with roofing nails or screws, making sure to follow the pattern and spacing specified by the manufacturer.
What should be done after installing roof sheathing?
After installing roof sheathing, it is important to protect it from moisture by installing a waterproof roof covering such as shingles. Additionally, you may need to install roof vents, flashing, and other necessary components to ensure a properly functioning and long-lasting roof system.
In Summary
In conclusion, installing roof sheathing is an important step in the process of constructing or repairing a roof. It provides structural support and helps protect the underlying layers from weather and other elements. By following the step-by-step guidelines outlined above, you can ensure a proper installation and a long-lasting roof. Remember to prioritize safety and consult professional roofing contractors if you feel unsure or uncomfortable with any aspect of the installation process. Whether you are a DIY enthusiast or someone looking for professional assistance, installing roof sheathing is a crucial task that should be approached with care and attention to detail.

Maintenance Programs Coordinator
Nathan Edwards is passionate about proactive roof maintenance programs designed to extend the lifespan of your roof. His commitment to preventing costly issues through regular upkeep sets him apart in the industry.