Flat roofs can often pose a unique challenge when it comes to protecting our homes and buildings from harsh winter weather. The accumulation of snow and ice can wreak havoc on these surfaces, leading to water leaks, structural damage, and higher energy bills. Fortunately, there’s a simple solution: heat cable. By installing this innovative system on your flat roof, you can ensure proper drainage, prevent the formation of ice dams, and extend the lifespan of your roof. In this article, we will guide you through the process of installing heat cable on a flat roof, providing step-by-step instructions and expert tips to help you tackle this project with confidence. So, roll up your sleeves and get ready to take control of your flat roof’s winter protection in a few straightforward steps.
Overview of heat cable installation on flat roofs
Installing heat cable on a flat roof can be a crucial step in ensuring the longevity and efficiency of your roof. The purpose of heat cable is to prevent ice dams from forming on your roof and causing potential damage. Ice dams occur when the heat from inside your building melts the snow on the roof, which then refreezes at the edge of the roof and creates a dam. This dam can trap water on your roof, leading to leaks, water damage, and even structural issues.
To alleviate this problem, heat cable is installed on the roof’s edge and in areas where ice dams are prone to form. The heat cable works by generating warmth that melts the snow and prevents ice dams from developing. Proper installation of heat cable on a flat roof is essential to ensure its effectiveness and to prevent any potential damage. This process involves careful planning, selecting the right heat cable, and following the correct installation steps.
When it comes to selecting the right heat cable for your flat roof, there are several factors to consider. These include the size of your roof, the climate in your area, and the specific requirements of your building. It’s important to choose a cable that is designed for flat roofs and has the appropriate wattage for your needs. Heat cables come in different lengths, so you’ll also need to determine the amount of cable required to cover your roof.
Proper preparation and planning are crucial before undertaking the installation of heat cable on a flat roof. This includes assessing the condition of your roof, identifying areas prone to ice dams, and determining the best placement for the cable. It’s important to clear any debris or obstructions from the roof to ensure a smooth and effective installation. Additionally, you may need to consider the electrical requirements and consult with a professional electrician to ensure the proper wiring and insulation are in place.
Overall, heat cable installation on a flat roof is a crucial step in preventing the formation of ice dams and protecting your building from potential damage. By understanding the importance of heat cable, selecting the right product, and properly planning and installing the cable, you can enhance the durability and functionality of your flat roof. In the following sections, we will provide a step-by-step guide to help you through the installation process and offer maintenance and troubleshooting tips to ensure the longevity of your heat cable system.
Understanding the importance of heat cable on flat roofs
Heat cable plays a vital role in protecting flat roofs from the damaging effects of ice dams and snow buildup. While flat roofs may be more prone to these issues due to their lack of slope, heat cable offers a solution that helps prevent costly repairs and roof damage.
One of the primary functions of heat cable is to melt snow and ice that accumulates on the roof. This is particularly crucial on flat roofs where the natural flow of water is minimal. When snow and ice build up, they can create dams that prevent proper drainage, leading to leaks, structural damage, and even collapses.
Heat cable works by generating enough heat to melt the snow and ice, creating channels for the water to flow off the roof. This helps maintain the integrity of the roof and prevents water from seeping into the building. By installing heat cable on a flat roof, you can minimize the risk of damage and ensure the longevity of your roof.
When selecting a heat cable for your flat roof, it’s important to consider the specific needs of your roof and the climate in which you reside. There are different types of heat cables available, such as self-regulating cables that adjust their heat output based on the ambient temperature, or constant-wattage cables that provide a consistent amount of heat. Consulting with a professional or doing thorough research can help you determine the best heat cable for your flat roof.
Installing heat cable on a flat roof requires proper planning and preparation to ensure its effectiveness. It’s essential to identify the areas where ice dams are most likely to form and determine the ideal placement for the heat cable. This may involve clearing away any debris or vegetation that could obstruct the installation or impede the flow of water.
By , you can take proactive measures to protect your investment and prolong the life of your roof. Whether you choose to install it yourself or hire a professional, heat cable installation can provide peace of mind knowing that your flat roof is safeguarded against the damaging effects of winter weather.
Selecting the right heat cable for your flat roof
is an important step in ensuring the efficacy and longevity of your heating system. With a wide range of options available on the market, it can be overwhelming to choose the most suitable heat cable for your specific needs. However, considering a few key factors will help you make an informed decision.
Firstly, it is crucial to assess the size and layout of your flat roof. Measure the length and width of the roof to determine the total area that needs to be covered by the heat cable. This will help you calculate the required length of the cable and ensure adequate coverage. Additionally, take note of any obstacles or unique features on your roof that may require special considerations during installation.
Next, consider the wattage and voltage requirements of the heat cable. Different roof types and climates may require varying levels of heat output. Generally, higher wattage cables provide more heat and are suitable for areas with harsher winter conditions. Be sure to check the manufacturer’s specifications and choose a cable that is compatible with your roof’s specific requirements.
Furthermore, it is important to consider the type of heat cable that is most suitable for your flat roof. There are two main types of heat cables: self-regulating and constant wattage. Self-regulating cables automatically adjust their heat output based on the surrounding temperature, making them energy-efficient and preventing overheating. Constant wattage cables provide a consistent level of heat throughout, making them ideal for areas that require a higher temperature output.
Lastly, look for heat cables that come with a warranty. This will give you peace of mind knowing that the manufacturer stands behind their product. Additionally, research customer reviews and ratings to ensure you are choosing a reputable brand that has a proven track record of quality and durability.
By considering factors such as roof size, wattage, cable type, and warranty, you can select the right heat cable for your flat roof. This will ensure maximum efficiency and protection for your roof during the winter months. Remember to follow the manufacturer’s guidelines and consult with a professional if you have any doubts or specific requirements for your roof.
Proper preparation and planning for heat cable installation
is essential to ensure a successful and efficient installation process. Prior to beginning the installation, it is important to gather all the necessary tools and materials. This typically includes heat cable, mounting brackets, clips, and a control panel.
The first step in the preparation process is to carefully measure the length of the roof where the heat cable will be installed. This will help determine the amount of cable needed for proper coverage. It is recommended to purchase slightly more cable than needed to account for any unexpected twists or turns.
Next, it is crucial to inspect the condition of the roof and address any necessary repairs before installing the heat cable. This may involve fixing cracks, patching holes, or reinforcing weak areas. It is important to have a structurally sound roof to ensure the proper installation and functionality of the heat cable.
Additionally, it is important to identify the areas on the roof that are most prone to ice dams and snow buildup. These are typically the areas where the heat cable should be installed. This strategic placement will prevent excessive energy usage and ensure the cable effectively melts snow and ice.
When planning the installation, it is important to consider the power source for the heat cable. The cable will need to be connected to an electrical outlet or power source, so it is important to ensure there is a nearby source available. If not, it may be necessary to hire an electrician to install a dedicated circuit for the heat cable.
Before beginning the installation process, it is important to familiarize yourself with the manufacturer’s instructions and any applicable local building codes. This will ensure that the installation meets safety standards and is done correctly. Additionally, it is crucial to prioritize safety by wearing appropriate protective gear, such as gloves and safety glasses, during the installation.
Overall, proper preparation and planning are key to a successful heat cable installation on a flat roof. Taking the time to gather the necessary tools and materials, inspect the roof for needed repairs, strategically place the cable, and ensure a power source is available will result in a more efficient and effective installation process.
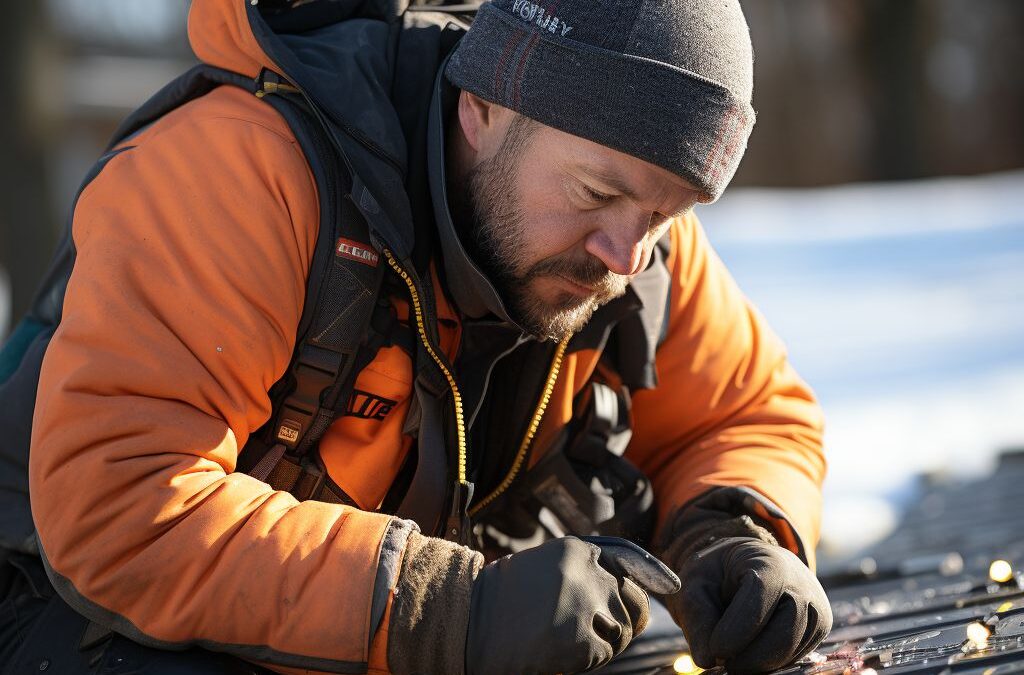
Step-by-step guide to installing heat cable on a flat roof
Installing heat cable on a flat roof is an important step in preventing ice dams and protecting your roof from winter damage. Here is a step-by-step guide to help you with the installation process.
First, you need to gather all the necessary materials and tools for the installation. This includes heat cables, clips or fasteners, a ladder, a tape measure, a screwdriver or drill, and electrical tape. Make sure to choose a high-quality heat cable that is specifically designed for flat roofs.
Next, start by measuring the length of the roof edge where you want to install the heat cable. This will help you determine how much cable you will need. It’s important to install the heat cable along the roof’s edge, as this is where ice dams typically form.
Once you have the measurements, begin by attaching the clips or fasteners to the roof edge. Make sure to space them evenly and securely fasten them to the roof surface. These clips will hold the heat cable in place.
Now, carefully unroll the heat cable along the roof edge, following the manufacturer’s instructions. Avoid stretching or bending the cable too much, as this can damage it. Use the clips or fasteners to secure the cable every few feet along the roof edge.
After securing the heat cable, it’s time to connect it to a power source. Locate a nearby electrical outlet and plug in the cable. Use electrical tape to secure any exposed connections and protect them from the elements.
Once the heat cable is properly installed and connected, make sure to test it to ensure it’s working correctly. Check for any visible signs of damage or loose connections. It’s also a good idea to monitor the cable throughout the winter season to ensure it is functioning effectively.
Remember, safety is paramount when working on your roof. Make sure to use a sturdy ladder and follow proper safety precautions. If you’re unsure about any part of the installation process, it’s best to consult a professional for assistance.
Installing heat cable on a flat roof is a crucial step in preventing winter roof damage. By following this step-by-step guide and taking the necessary precautions, you can ensure that your flat roof is well-protected during the colder months.
Common pitfalls to avoid during heat cable installation
During the process of installing heat cable on a flat roof, it is important to be aware of the common pitfalls that can hinder the effectiveness and longevity of your installation. By avoiding these pitfalls, you can ensure a successful and durable heat cable system for your flat roof.
One common pitfall to avoid is improper cable spacing. The spacing of the heat cable is crucial for ensuring even distribution of heat across the roof’s surface. If the cable is spaced too far apart, there may be cold spots that can lead to ice dams and other problems. On the other hand, if the cable is spaced too closely, it can create excessive heat and overload the system, potentially causing damage to the roof or the cable itself. It is important to carefully follow the manufacturer’s guidelines for proper spacing to avoid these issues.
Another pitfall to avoid is inadequate insulation. Insulation plays a key role in the effectiveness of the heat cable system. Without proper insulation, heat can escape through the roof, reducing the overall efficiency of the system. It is important to ensure that your roof is adequately insulated before installing the heat cable. This will help to prevent heat loss and minimize energy consumption.
Proper installation of the cable clips is another important consideration. Cable clips are used to secure the heat cable in place on the roof. It is important to use the correct type and size of cable clips recommended by the manufacturer. Using improper clips or installing them incorrectly can lead to the cable being loose or not held securely in place, which can disrupt the distribution of heat and compromise the effectiveness of the system.
Regular maintenance and inspections are also crucial to avoiding pitfalls in heat cable installation. It is important to periodically inspect the cable for any signs of damage or wear, such as fraying or loose connections. If any issues are detected, they should be addressed promptly to prevent further damage and ensure the longevity of the heat cable system.
By being aware of and avoiding these common pitfalls, you can ensure a successful and efficient installation of heat cable on your flat roof. Following the manufacturer’s guidelines, properly spacing the cables, ensuring adequate insulation, using the correct cable clips, and performing regular maintenance will help to maximize the effectiveness and lifespan of your heat cable system.
Maintenance and troubleshooting tips for heat cable on flat roofs
Proper maintenance and troubleshooting are essential for ensuring the longevity and effectiveness of heat cable on flat roofs. By following these tips, you can prevent potential issues and keep your roof protected from ice dams and snow buildup.
1. Regular Inspection: It is crucial to inspect your heat cable system on a regular basis, especially before winter. Inspect the cable for any signs of damage such as fraying, exposed wires, or loose connections. Ensure that the cable is securely attached to the roof and the clips or brackets are not damaged or deteriorated.
2. Clean the Gutters: Clean your gutters and downspouts regularly to prevent clogs. Leaves, debris, and ice can block the water flow, which may cause the heat cable to overwork and potentially result in damage or failure. Use a gutter brush or scoop to remove any obstructions and ensure proper drainage.
3. Test the System: Before the winter season, test the entire heat cable system to ensure it is functioning correctly. Plug it in and carefully observe that the cable warms up evenly and stays consistent throughout its length. If there are any areas that do not heat up or if you detect any abnormalities, it may indicate a problem with the cable that requires maintenance or replacement.
4. Check the Thermostat: The thermostat is a vital component of the heat cable system. Ensure it is properly calibrated and set to the recommended temperature. Follow the manufacturer’s instructions to adjust the thermostat if needed. Regularly check the thermostat to make sure it is operational and maintaining the desired temperature to prevent ice dams.
5. Clear Snow Buildup: After heavy snowfall, promptly remove any snow buildup on your roof. While the heat cable can prevent ice dams, excessive snow accumulation can overwhelm the system. Use a roof rake or hire professionals to safely remove the snow, taking care not to damage the heat cable in the process.
Remember, if you encounter any issues or are unsure about performing maintenance or troubleshooting tasks, it is best to consult a professional roofing contractor or electrician. They will have the expertise to diagnose and address any problems to ensure the continued effectiveness of your heat cable system. By following these maintenance tips and promptly addressing any issues, you can keep your flat roof protected and minimize the risk of ice dams and roof damage.
People Also Ask
1. What is heat cable and how does it work?
Heat cable, also known as heat trace or heating cable, is a flexible electrical cable used for preventing ice formations and snow build-up on roofs, gutters, and pipes. It works by generating heat when electricity is passed through it, melting ice and preventing the formation of ice dams.
2. Can I install heat cable on a flat roof myself?
While it is technically possible to install heat cable on a flat roof yourself, it is recommended to hire a professional contractor who is experienced in roof installations. Ensuring proper installation is crucial for the effectiveness and safety of the heat cable system.
3. What materials do I need to install heat cable on a flat roof?
To install heat cable on a flat roof, you will typically need the heat cable itself, mounting clips or adhesive, an electrical junction box, connectors, and appropriate electrical wiring. Additionally, you may need insulation and a roof rake to clear snow accumulation before installation.
4. Where should the heat cable be installed on a flat roof?
The heat cable should be installed in areas where ice dams and snow accumulation are most likely to occur, such as along the roof edges, in valleys, and around roof penetrations. It is important to follow the manufacturer’s instructions and consult with a professional to determine the most effective placement for your specific roof.
5. Are there any safety precautions to consider when installing heat cable on a flat roof?
Yes, there are several safety precautions to consider during the installation of heat cable on a flat roof. These include ensuring proper electrical connections, avoiding overloading electrical circuits, using appropriate insulation and fire-rated materials, and following all local building codes and regulations. It is advisable to hire a professional to guarantee a safe and effective installation.
Wrapping Up
In conclusion, installing heat cable on a flat roof is a relatively straightforward process that can greatly help prevent ice dams and snow buildup during winter months. By carefully planning the layout of the heat cable and following the manufacturer’s instructions, you can ensure that your roof remains protected throughout the cold season.
Remember to always prioritize safety and consult with a professional if you’re unsure about any step of the installation process. Regular maintenance and inspections are also necessary to ensure the heat cable continues to function effectively.
By taking the necessary steps to install heat cable on your flat roof, you can protect your home and minimize the potential damage caused by snow and ice. Consider installing heat cable as a proactive measure and enjoy peace of mind during the winter months.

Alexander Johnson is a seasoned roofing professional with over 25 years in the industry and CEO at Fresno Roof Repair. His expertise blends traditional craftsmanship with cutting-edge technology, focusing on resilient roofing solutions tailored to Fresno’s diverse climate. As a leader at Fresno Roof Repair, Alexander emphasizes open communication, teamwork, and continual education, ensuring every client receives exceptional service. Beyond his role, Alexander is deeply committed to the Fresno community, supporting local initiatives. His dedication, technical proficiency, and customer-centric approach make him an invaluable asset to Fresno Roof Repair, embodying the company’s commitment to excellence and quality roofing solutions.