Have you ever wondered about the crucial role that flashing plays in protecting your metal roof?”>metal roof?”>metal roof from leaks and water damage? If you’re a homeowner or a contractor looking to install flashing on a metal roof, this article is here to guide you through the process, step by step. Whether you’re a seasoned DIY enthusiast or a novice in the world of roofing repairs, this informative piece will equip you with the knowledge and skills needed to successfully install flashing on your metal roof. So, let’s dive right in and discover the essential techniques that will ensure a watertight and long-lasting roof for your home or building.
Understanding the Importance of Flashing on Metal Roofs
Flashing is an essential component when it comes to installing a metal roof. It plays a crucial role in preventing water from seeping into the roof and causing damage to the underlying structure. Without proper flashing, water can easily penetrate the gaps between the metal panels, leading to leaks, rot, and mold growth. Therefore, is crucial for maintaining the integrity and longevity of your roof.
One of the key functions of flashing is to provide a waterproof barrier at vulnerable areas such as roof valleys, chimneys, skylights, and vent pipes. These areas are prone to water intrusion due to their design or the materials used in their construction. Without flashing, any water that comes into contact with these areas would find its way into your home, causing extensive damage over time.
Flashing on metal roofs is typically made from durable materials such as aluminum, galvanized steel, or copper. These materials are resistant to corrosion and can withstand harsh weather conditions. It is important to choose the right type and gauge of flashing material based on your specific requirements and the environmental factors in your area. Failure to use the appropriate flashing material can result in premature deterioration and compromised protection.
In addition to preventing water intrusion, flashing also helps to divert water away from sensitive areas of the roof. It guides water to the gutters or edge of the roof, preventing pooling and potential damage. Proper installation is key to ensuring the effectiveness of the flashing system. It should be securely fastened and properly sealed to provide a watertight seal. Regular inspection and maintenance of flashing are also important to identify any issues early on and prevent any potential water damage.
Overall, is crucial in preserving the structural integrity of your roof and protecting your home from water damage. By choosing the right materials, properly preparing the roof, and following a step-by-step installation process, you can ensure that your flashing system provides long-lasting waterproofing and peace of mind for years to come.
Choosing the Right Materials for Installing Flashing on a Metal Roof
When it comes to installing flashing on a metal roof, selecting the right materials is crucial for ensuring the longevity and effectiveness of the installation. The materials chosen should be able to withstand the harsh elements and create a watertight seal that prevents leaks and potential damage to the roof. Here are some considerations to keep in mind when choosing the materials for installing flashing on a metal roof.
First and foremost, it is important to select flashing materials that are specifically designed for use on metal roofs. While some flashing materials may work well on other types of roofs, using them on metal roofs can lead to compatibility issues and ineffective sealing. Look for flashing materials made from durable metals such as aluminum, stainless steel, or copper, as they offer excellent resistance against corrosion and can maintain their structural integrity even in extreme weather conditions.
When it comes to the shape of the flashing, there are various options available, including L-shaped, J-shaped, or continuous roll flashing. The choice of shape depends on the specific requirements of your metal roof, such as the pitch and design. It’s crucial to choose flashing that fits snugly against the roof and creates a seamless transition between the roof panel and any adjoining structures, such as chimneys or skylights.
In addition to the main flashing materials, it is equally important to consider the supporting materials that will ensure a secure and watertight installation. This includes using high-quality roofing caulk or sealant to fill any gaps or joints between the flashing and the roof surface. Using a sealant that is specifically designed for metal roofs will provide optimal adhesion and remain flexible to accommodate any expansion or contraction of the roof panels.
Lastly, it is essential to invest in high-quality fasteners and screws that are compatible with the flashing material. Using subpar or mismatched fasteners can compromise the integrity of the flashing system and lead to leaks over time. Stainless steel screws are an excellent choice for securing the flashing, as they offer excellent corrosion resistance and long-term durability.
When it comes to , prioritize durability, compatibility, and watertightness. By using flashing materials designed specifically for metal roofs, along with appropriate supporting materials and fasteners, you can ensure a successful installation that protects your roof from potential leaks and damage for years to come.
Preparing the Metal Roof for Flashing Installation
Before installing flashing on a metal roof, proper preparation is crucial to ensure a successful and long-lasting installation. The metal roof must be thoroughly cleaned and inspected to ensure it is in good condition, free from any debris or damage that could affect the flashing’s performance.
First, start by removing any existing flashing or sealants that may be present on the roof. Use a scraper or wire brush to gently remove any old sealants, taking care not to damage the metal surface. This step is important to ensure proper adhesion of the new flashing and prevent any compromised areas that could lead to water leakage.
Next, thoroughly clean the metal roof with a mild detergent and water to remove any dirt, dust, or grime. Use a soft-bristle brush or sponge to scrub the surface, paying special attention to areas around seams, joints, and edges. Rinse off the soap residue with clean water and allow the roof to dry completely before proceeding further.
Once the metal roof is clean and dry, inspect it for any signs of damage, such as rust, corrosion, or loose panels. Repair or replace any damaged sections before proceeding with the flashing installation. It is crucial to have a solid and structurally sound roof surface to ensure the flashing properly adheres and provides the necessary protection against water infiltration.
Additionally, check for any protrusions or irregularities on the roof that could interfere with the installation of the flashing. These may include vents, chimneys, skylights, or other fixtures. Measure and mark the precise locations where the flashing will be installed to ensure accurate placement and a tight seal around these areas.
By thoroughly preparing the metal roof before installing flashing, you will ensure a clean, smooth surface that promotes strong adhesion and long-term performance of the flashing material. Taking the time and effort to properly prepare the roof will contribute to the overall effectiveness and longevity of the flashing installation, providing essential protection for your metal roof against water infiltration and potential damage.
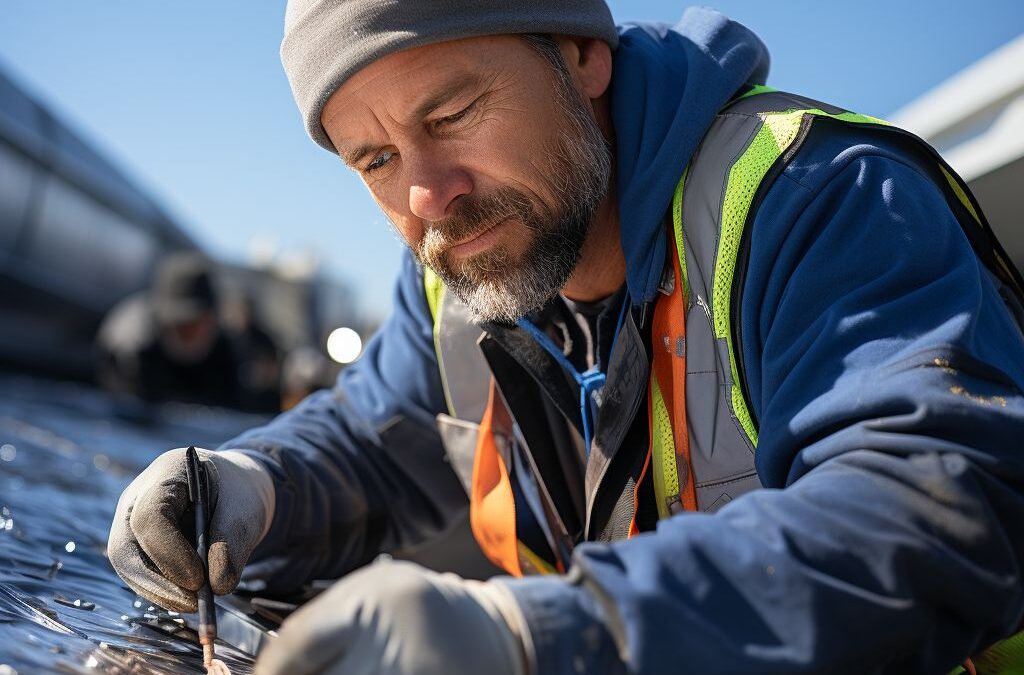
Step-by-Step Guide to Installing Flashing on a Metal Roof
Installing flashing on a metal roof is an important step in ensuring the roof’s durability and preventing leaks. Flashing serves as a protective barrier that redirects water away from vulnerable areas such as roof joints, valleys, and chimneys. Here is a :
1. Prepare the area: Before installing flashing, ensure that the metal roof is clean and free from debris. Use a broom or brush to remove any dirt, leaves, or loose material.
2. Measure and cut the flashing: Take accurate measurements of the areas where the flashing will be installed. Use tin snips or a metal-cutting saw to cut the flashing to the appropriate length and shape.
3. Apply caulk: Apply a generous amount of roofing caulk on the underside of the flashing. This will create a watertight seal when the flashing is installed on the metal roof.
4. Position the flashing: Carefully position the flashing on the desired area of the metal roof. Make sure it aligns properly with the joints or edges that need protection.
5. Secure the flashing: Use roofing screws or nails to secure the flashing onto the metal roof. Place the fasteners in the pre-drilled holes or within the designated areas on the flashing.
6. Seal the flashing: Apply a layer of roofing caulk along the edges of the flashing to ensure a secure and waterproof seal. Press the caulk firmly into place using a caulk gun or putty knife.
7. Repeat the process: Repeat steps 2-6 for each area where flashing is needed on the metal roof.
8. Inspect for any gaps or imperfections: Once all the flashing is installed, inspect the roof for any gaps or areas that may need additional sealing. If necessary, apply more caulk to ensure a tight seal.
Remember, proper installation of flashing is crucial for protecting your metal roof from water damage. It’s essential to follow these steps carefully and ensure a secure attachment and seamless seal. By installing flashing correctly, you can extend the lifespan of your metal roof and prevent costly repairs down the line.
Ensuring Proper Attachment and Seal for Flashing on a Metal Roof
Proper attachment and seal of flashing on a metal roof are crucial for preventing leaks and maintaining the integrity of the roof. When installing flashing, it is essential to follow the correct techniques to ensure a watertight seal. Here are a few important considerations for .
Firstly, it is important to choose the right type of flashing material that is specifically designed for metal roofs. Metal-specific flashing materials, such as aluminum or galvanized steel, are durable and corrosion-resistant, making them ideal for use on metal roofs. Using the correct material will help to ensure a secure attachment and a long-lasting seal.
Before attaching the flashing, make sure the surface is clean and free from debris. Any dirt or particles on the metal roof surface can prevent the flashing from adhering properly. Use a broom or air blower to remove any loose materials, and then wipe the surface with a clean cloth or sponge.
To attach the flashing, use roofing screws or nails that are appropriate for the type of metal roofing material you are working with. Be sure to place fasteners in the correct locations, following the manufacturer’s guidelines or any specific instructions provided.
To create a watertight seal, consider using a high-quality roofing sealant or adhesive. Apply a generous amount of sealant to the edges of the flashing, ensuring full coverage along the seams and any joints. This will help to prevent water penetration and reinforce the attachment of the flashing.
It is also important to pay attention to the shape and design of the flashing. Each section of flashing should overlap the previous one, forming a tight interlocking seal. This is especially important in areas where water runoff is more concentrated, such as valleys or around chimneys. The overlapping design helps to guide water away from vulnerable areas and directs it towards the eaves or gutters.
Regular inspection and maintenance are essential for ensuring that the flashing remains properly attached and sealed. Check for any signs of damage or wear, such as rust, loose screws, or cracked sealant. Promptly address any issues to prevent further damage or potential leaks.
In conclusion, plays a vital role in preventing leaks and maintaining the longevity of the roof. By selecting the right materials, preparing the surface correctly, following proper installation techniques, and performing regular maintenance, you can ensure a secure and watertight seal for your metal roof flashing.
Maintenance Tips for Long-lasting Flashing on a Metal Roof
To ensure the longevity and effectiveness of the flashing on your metal roof, it is important to follow proper maintenance practices. By taking the time to regularly inspect and care for your flashing, you can prevent potential leaks and water damage. Here are some maintenance tips to keep your flashing in optimal condition:
1. Regular Inspections: Perform visual inspections of your flashing at least once a year, preferably during the spring or fall. Look for any signs of damage, such as cracks, gaps, or loose sections. Pay special attention to areas where the flashing meets other roof components, such as chimneys, vents, or skylights.
2. Clear Debris: Keep the flashing free from debris, such as leaves, branches, or dirt. Clogged or obstructed flashing can lead to water accumulation and potential damage. Use a soft brush or broom to gently sweep away any debris, taking care not to damage the flashing in the process.
3. Check for Proper Seal: Ensure that the flashing is properly sealed to the roof surface. Over time, sealant may deteriorate or crack, compromising the flashing’s effectiveness. If you notice any areas where the sealant is damaged or missing, it is important to reseal them promptly. Use a high-quality roofing sealant that is compatible with your metal roof material.
4. Address Rust or Corrosion: Metal flashing is susceptible to rust and corrosion, especially in regions with high humidity or exposure to saltwater. Regularly check the flashing for any signs of rust or corrosion and take immediate action to address it. Use a wire brush or sandpaper to remove any rust, then apply a rust-inhibiting primer and finish with a suitable metal paint or coating.
5. Maintain Gutters and Downspouts: Properly functioning gutters and downspouts are essential for redirecting water away from your roof and flashing. Regularly clean and inspect your gutters, removing any debris that could cause water to back up and potentially damage the flashing. Ensure that downspouts are clear and extend at least a few feet away from the foundation.
6. Address Repairs Promptly: If you notice any signs of damage or deterioration during your inspections, it is crucial to address them promptly. Ignoring or delaying repairs can lead to further damage and costly repairs down the road. Contact a professional roofing contractor who specializes in metal roofs to assess and repair any issues with your flashing.
By following these maintenance tips, you can extend the lifespan of your flashing and ensure its effectiveness in preventing water intrusion. Regular inspections and proactive care will help you maintain a watertight and secure metal roof for years to come.
People Also Ask
What type of flashing is best for a metal roof?
The best type of flashing for a metal roof is usually made of a durable material such as stainless steel, aluminum, or copper. These materials are resistant to corrosion and can withstand the elements, ensuring long-lasting protection for your roof.
What tools do I need to install flashing on a metal roof?
To install flashing on a metal roof, you will typically need a few common tools such as a tape measure, metal snips, a drill, roofing cement, roofing nails?”>roofing nails?”>roofing nails, and a caulking gun. These tools will help you accurately measure, cut, and secure the flashing in place.
Can I install flashing on a metal roof myself?
Installing flashing on a metal roof can be a DIY project if you have the necessary skills and tools. However, it is recommended to consult with a professional roofer or follow manufacturer’s instructions to ensure proper installation and avoid any potential damage to the roof.
What are the steps to install flashing on a metal roof?
The steps to install flashing on a metal roof typically involve measuring and cutting the flashing to the required length, applying roofing cement, placing the flashing in the desired position, and securing it with roofing nails or screws. It is important to follow the manufacturer’s instructions or seek professional guidance for specific details.
Why is flashing important for a metal roof?
Flashing is crucial for a metal roof as it helps prevent water infiltration and directs it away from vulnerable areas such as roof seams, joints, and penetrations. Properly installed flashing provides an additional layer of protection against water damage and helps maintain the integrity of the roof structure.
Concluding Remarks
In conclusion, installing flashing on a metal roof is a crucial step in ensuring its durability and preventing water leaks. By following the provided steps and using the right materials, you can successfully install flashing on a metal roof. It’s important to note that if you’re not confident in your abilities or lack the necessary tools, it’s best to seek professional assistance to achieve the best results. With proper installation, your metal roof will be well-protected and provide years of reliable service.

Customer Relations Manager
Benjamin Turner is a customer-centric professional, placing emphasis on open communication and transparency throughout the roofing process. His dedication to client satisfaction ensures a smooth and collaborative experience.