When it comes to roofing materials, EPDM has steadily gained popularity in the roof repair niche. As a reliable and affordable option, many homeowners and contractors are turning to this versatile material for their roofing needs. Whether you’re a seasoned DIY enthusiast or a professional contractor looking to learn more about EPDM roofing installation, this article will guide you through the step-by-step process, ensuring you have all the knowledge and know-how to complete the task successfully. From the necessary tools and materials to the detailed instructions, we’ve got you covered. So, let’s dive into the world of EPDM roofing and unlock the secrets to a seamless installation that will protect your home for years to come.
Choosing the Right Materials for EPDM Roofing Installation
EPDM (Ethylene Propylene Diene Terpolymer) roofing is an excellent choice for roof repair due to its durability and longevity. However, the success of your EPDM roofing installation greatly depends on choosing the right materials. It is crucial to select high-quality materials that are specifically designed for EPDM roofing installation to ensure a safe and effective process.
When choosing materials for EPDM roofing installation, one of the key considerations is the membrane itself. EPDM membranes come in different thicknesses, typically ranging from 45 to 90 millimeters. Thicker membranes are generally more durable and have a longer lifespan, but they may also be more expensive. Consider the climate and the specific needs of your roof to determine the appropriate thickness.
Another important material to consider is the adhesive. The adhesive is responsible for bonding the EPDM membrane to the roof surface, so it is essential to choose a high-quality adhesive that is specifically formulated for EPDM roofing installation. Make sure the adhesive is compatible with both the EPDM membrane and the roof substrate to achieve a strong and long-lasting bond.
In addition to the membrane and adhesive, it is also important to select the right sealant for EPDM roofing installation. Sealants are used to fill gaps and seal seams, preventing water penetration and ensuring a watertight roof. Choose a sealant that is compatible with EPDM roofing and provides excellent adhesion and flexibility.
Lastly, consider the type of flashing and edge details you will need for your EPDM roofing installation. Flashing is used to direct water away from vulnerable areas such as roof edges, vents, and skylights. It is crucial to choose flashing materials that are compatible with EPDM roofing, such as flexible EPDM flashing tapes or metal flashing with EPDM gaskets.
Remember, the materials you choose for your EPDM roofing installation will greatly impact the overall performance and longevity of your roof. Investing in high-quality materials that are specifically designed for EPDM roofing will ensure a successful and durable installation, providing you with peace of mind for years to come.
Preparing the Roof for EPDM Installation: Inspection and Repair
When it comes to installing EPDM roofing, proper preparation is key to ensuring a successful and long-lasting installation. Before you can begin the installation process, it is important to thoroughly inspect and repair your roof. By identifying any existing issues and addressing them beforehand, you can avoid potential complications down the line.
During the inspection phase, carefully examine the entire roof surface for any signs of damage, such as cracks, tears, or weak spots. Remember to pay close attention to the areas around roof penetrations, such as vents, skylights, and chimneys, as they are prone to leaks. Make note of any repairs that need to be made before proceeding with the EPDM installation.
Once the inspection is complete, it’s time to start repairing any identified issues. Begin by cleaning the roof surface to remove any dirt, debris, or loose materials that may interfere with the adhesion of the EPDM membrane. Use a broom or a leaf blower to remove larger debris, and then follow up with a thorough cleaning using a roof cleaner or mild detergent mixed with water.
Next, you’ll need to address any cracks or holes on your roof. For smaller cracks or punctures, an elastomeric caulk or roofing cement can be used to seal the gaps. Simply apply the product generously into the crack or hole, using a putty knife or caulking gun. For larger or more extensive damage, you may need to consider replacing the damaged areas or seek professional help.
In addition to repairing existing damage, it is also important to ensure that your roof is properly aligned and has adequate slope for proper drainage. Inspect the roof’s surface for any low areas or sagging, as these can result in water pooling and potential leaks. If necessary, make the appropriate adjustments to ensure proper water flow away from the roof.
Taking the time to thoroughly inspect and repair your roof before EPDM installation will help create a solid foundation for the membrane. By addressing any existing issues and ensuring proper alignment and drainage, you can enhance the longevity and effectiveness of your EPDM roofing system.
Remember, a well-prepared roof is the first step towards a successful EPDM installation.
Step-by-Step Guide to EPDM Roof Installation
EPDM roofing installation requires careful planning and attention to detail. It is crucial to follow a step-by-step guide to ensure a successful installation process. Here, we will provide you with a comprehensive guide on how to install EPDM roofing on your roof.
1. Clean and prepare the roof surface: Before installing EPDM roofing, it is important to ensure that the roof surface is clean and free from debris. Remove any loose shingles, nails, or other materials that could interfere with the adhesive bond. Use a broom or blower to remove any dirt or dust.
2. Measure and cut the EPDM membrane: Carefully measure the dimensions of your roof and add a few inches to each side for overlap. Using a utility knife or scissors, cut the EPDM membrane to the appropriate size. Remember to cut a separate piece for each section of the roof, if necessary.
3. Apply adhesive: Starting from one end of the roof, apply adhesive to the surface using a paint roller or brush. Ensure that the adhesive is applied evenly and covers the entire surface. Be sure to follow the manufacturer’s instructions for proper adhesive application.
4. Lay the EPDM membrane: Carefully lay the EPDM membrane onto the adhesive, starting from one end and working your way across the roof. Smooth out any wrinkles or bubbles with a roof broom or squeegee.
5. Seam and edge preparation: When joining two pieces of EPDM membrane together, follow the manufacturer’s instructions for seam preparation and adhesive application. This usually involves applying primer and seam tape to ensure a strong and watertight bond.
6. Trim excess membrane: After the EPDM membrane is securely in place, trim any excess material using a utility knife. Be careful not to cut into the roof structure or the EPDM membrane itself.
7. Install flashing and edge details: Depending on the specific roofing design, you may need to install flashing and edge details to provide additional protection against water infiltration. Follow the manufacturer’s instructions for proper installation.
8. Inspect and test the roof: Once the EPDM roofing installation is complete, carefully inspect the entire roof for any signs of damage or areas that may need additional attention. Perform a water test to ensure that the roof is watertight and properly sealed.
Remember, the installation process may vary depending on the specific brand and type of EPDM roofing you choose. Always refer to the manufacturer’s instructions for detailed guidelines and recommendations. By following this step-by-step guide, you can achieve a reliable and durable EPDM roofing installation.
Proper Adhesive Application for EPDM Roofing Installation
During the installation of EPDM roofing, one of the most crucial steps is the proper application of adhesive. This is what ensures that the rubber membrane securely adheres to the roof surface, creating a durable and watertight barrier. In this section, we will discuss the importance of using the right adhesive, as well as provide a step-by-step guide on how to apply it correctly.
1. Choosing the Right Adhesive:
When it comes to EPDM roofing installation, not all adhesives are created equal. It is essential to select an adhesive specifically designed for EPDM membranes to ensure compatibility and maximum performance. Look for adhesives that are solvent-based, as they provide excellent bonding strength and superior resistance to temperature changes. Additionally, consider the coverage rate of the adhesive to estimate the quantity needed for your installation.
2. Preparing the Surface:
Before applying the adhesive, it is crucial to prepare the roof surface properly. Ensure that the surface is clean, dry, and free from any debris or contaminants that may hinder proper adhesion. Use a broom or blower to remove loose dirt and debris, and if necessary, pressure wash the surface to remove stubborn dirt or grime. Additionally, inspect the roof for any damages or defects that need to be repaired before proceeding with the adhesive application.
3. Applying the Adhesive:
To begin the adhesive application, start by pouring a small amount of adhesive onto the roof surface and spread it evenly using a notched trowel or brush. Work in small sections to ensure that the adhesive does not dry out before the EPDM membrane is laid. Apply an even layer of adhesive to both the roof surface and the underside of the EPDM membrane. Pay particular attention to the edges and corners, ensuring they are well-coated for proper adhesion.
4. Bonding the Membrane:
After applying the adhesive to the roof surface and membrane, wait for the adhesive to become tacky. This usually takes around 15-20 minutes, depending on the weather conditions. Once the adhesive is tacky to the touch, carefully position the EPDM membrane onto the roof surface, taking care to align it correctly. Use a roller or broom to press down firmly on the membrane, ensuring proper bonding between the membrane and the adhesive.
Remember, it is crucial to work in small sections to prevent the adhesive from drying out before you lay the EPDM membrane. Take your time to ensure the membrane is correctly aligned and press it firmly onto the adhesive to eliminate any air bubbles or gaps that could compromise the integrity of the installation.
By following these steps and using the appropriate adhesive, you can ensure a proper and long-lasting installation of your EPDM roofing. Keeping the adhesive application precise and accurate will contribute to the overall durability and effectiveness of your EPDM roof for years to come.
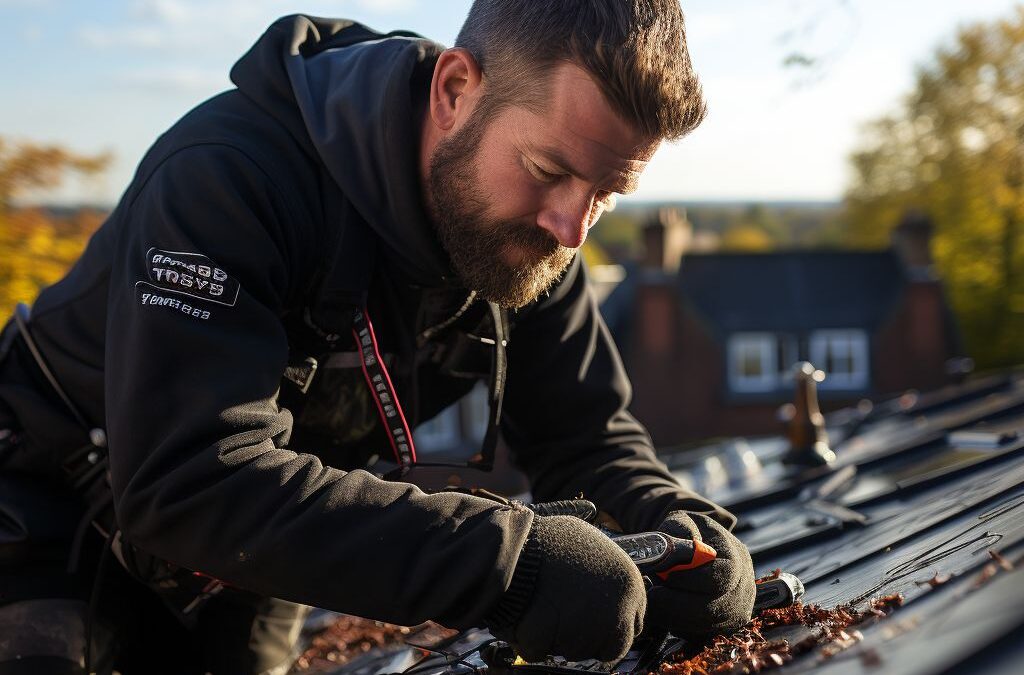
Tips for Seam Sealing and Flashing Installation on EPDM Roofs
Seam sealing and flashing installation are crucial steps in ensuring the longevity and effectiveness of an EPDM roof. These procedures help to prevent water infiltration, which can lead to leaks and damage. Here are some useful tips to ensure proper seam sealing and flashing installation on EPDM roofs.
1. Use high-quality adhesive: When it comes to seam sealing and flashing on EPDM roofs, using the right adhesive is crucial. Make sure to choose a high-quality adhesive that is specifically designed for EPDM roofing. Look for adhesives that are weather-resistant and can withstand the harsh elements. Apply the adhesive evenly and generously to ensure a secure bond between the seams and flashing.
2. Clean and prepare the surface: Before applying adhesive, it is essential to clean and prepare the surface thoroughly. Remove any dirt, debris, or loose particles from the EPDM membrane and flashing. Clean the area with a mild detergent and water solution, gently scrubbing with a soft brush or cloth. Rinse the surface with clean water and allow it to dry completely before proceeding with the seam sealing and flashing installation.
3. Apply pressure to ensure a tight seal: When joining seams or attaching flashings, it is crucial to apply sufficient pressure to ensure a tight seal. Use a roller or special EPDM seam roller to press down firmly on the seams or flashings. This will help to create a secure bond and prevent any gaps or openings that could lead to water penetration. Roll over the entire length of the seam or flashing multiple times to ensure a thorough and effective seal.
4. Use EPDM-compatible sealants: In addition to adhesive, using EPDM-compatible sealants can further enhance the integrity of seam sealing and flashing installation. These sealants are designed specifically for EPDM roofing systems, providing an extra layer of protection against leaks. Apply the sealant in a continuous bead along the edges of the seams or flashings, ensuring full coverage. Smooth out the sealant with a putty knife or sealant tool for a professional finish.
By following these tips, you can ensure proper seam sealing and flashing installation on EPDM roofs. This will help to prevent water infiltration, protect against leaks, and extend the lifespan of the roofing system. With careful attention to detail and the use of high-quality materials, your EPDM roof will be well-prepared to withstand the elements and provide lasting protection for your property.
Maintaining and Repairing EPDM Roofing: Dos and Don’ts
Proper maintenance and timely repair are critical for prolonging the lifespan and ensuring the effectiveness of your EPDM roofing. By following these dos and don’ts, you can take proactive measures to keep your roof in excellent condition.
Dos:
Regular Inspections: Conduct routine inspections to identify any signs of damage or wear on your EPDM roof. Look for tears, punctures, and loose seams. Addressing these issues promptly can prevent further damage.
Clean Regularly: Keep your EPDM roof clean by removing debris, leaves, and twigs. Clogged gutters can lead to water pooling, which can cause damage to the membrane. Use a soft bristle brush or a leaf blower to clean the roof surface gently. Be cautious not to damage the membrane while cleaning.
Proper Drainage: Ensure that your EPDM roof has adequate drainage. Removing standing water is crucial for avoiding leaks and preventing structural damage. Check that your gutters, downspouts, and drains are clear and in good working condition.
Repair with Compatible Materials: If you encounter any damage to your EPDM roof, it is essential to use compatible repair materials. EPDM repair kits are readily available, containing the necessary adhesives, primers, and patches. Follow the manufacturer’s instructions and use approved products to ensure effective and long-lasting repairs.
Don’ts:
AVOID Harsh Cleaners: When cleaning your EPDM roof, avoid using harsh detergents, solvents, or bleaching agents. These chemicals can deteriorate the membrane and compromise its integrity. Stick to mild soap or specialized EPDM roof cleaning solutions.
Avoid Sharp Objects: Be cautious when working on or near your EPDM roof to prevent accidental damage from sharp objects, such as tools or falling debris. Never use sharp tools directly on the roof surface as it can result in tears or punctures.
AVOID Petroleum-Based Products: Petroleum-based products, such as tar or asphalt, should not be used on EPDM roofing. These substances can cause the membrane to swell, blister, or even fail. Always consult the manufacturer or a roofing professional for guidance on compatible products.
Don’t Neglect Small Issues: Even minor damage on your EPDM roof can escalate into major problems if ignored. Small tears, cracks, or loose seams can allow water infiltration, leading to leaks and potential structural damage. Promptly address any issues to prevent costly repairs down the line.
By following these dos and don’ts, you can ensure that your EPDM roofing remains in optimal condition. Regular maintenance and prompt repairs will help extend its lifespan, increase its durability, and provide you with long-term protection for your property.
People Also Ask
What tools and materials do I need to install EPDM roofing?
To install EPDM roofing, you will need tools such as a hammer, utility knife, paintbrush, and a roller. Materials you will need include EPDM membrane, adhesive, seam tape, and roofing screws.
Can I install EPDM roofing myself?
Yes, with proper instructions and basic knowledge of roofing, you can install EPDM roofing yourself. However, it is recommended to consult a professional or refer to manufacturer guidelines for a successful installation.
Do I need to prepare the roof before installing EPDM?
Yes, before installing EPDM roofing, you need to clean and dry the roof surface thoroughly. Remove any debris, repair damaged areas, and ensure a smooth and even surface for proper adhesion.
How long does it take to install EPDM roofing?
The installation time for EPDM roofing can vary depending on the size and complexity of the roof, but it typically takes a few days to complete. Factors such as weather conditions and the expertise of the installer can also affect the installation time.
Can EPDM roofing be installed in any climate?
EPDM roofing can be installed in a wide range of climates. It is highly resistant to UV rays, extreme temperatures, and weathering, making it suitable for both hot and cold climates. It is important to follow proper installation techniques for optimal performance in any climate.
Final Thoughts
In conclusion, installing EPDM roofing is a straightforward process that requires careful preparation and attention to detail. By following the recommended steps, which involve proper cleaning and priming of the roof, applying the EPDM membrane, and ensuring proper adhesion and sealing, you can successfully install EPDM roofing on your property.
This versatile roofing material offers excellent durability, waterproofing, and energy efficiency benefits, making it a popular choice for both residential and commercial buildings. Hiring a professional roofing contractor may be the best option if you lack the necessary experience or tools for the installation.
Remember to conduct thorough research and seek advice from professionals to ensure that the EPDM roofing installation is done correctly. By following the proper installation guidelines and maintaining the roof regularly, you can enjoy the benefits of EPDM roofing for many years to come.
Consider consulting with a professional roofing contractor or supplier to get more information about EPDM roofing options and installation services. They can provide tailored advice based on your specific needs and help you determine the best course of action for your roofing project.

Innovation and Technology Director
William Simmons is dedicated to bridging the gap between innovative roofing technologies and traditional craftsmanship. His focus on blending modern techniques with reliable practices ensures optimal results for our clients.