The roof is perhaps one of the most important aspects of any home, providing shelter and protection from the harsh elements. Over time, however, the roof inevitably undergoes wear and tear, with roof shingles being particularly vulnerable to damage. Ignoring the state of your roof shingles can lead to leaks, water damage, and ultimately costly repairs. That’s why it is crucial for homeowners to know how to properly inspect their roof shingles, ensuring that they can identify any issues and address them before they escalate. So, if you’re ready to become your own roof inspector, read on as we guide you through the step-by-step process to ensure the longevity and integrity of your roof.
Understanding the Importance of Inspecting Roof Shingles
Regularly inspecting your roof shingles is crucial to maintaining the integrity of your roof and preventing costly repairs down the line. Roof shingles are the first line of defense against harsh weather conditions, so it’s important to make sure they are in good condition. By , homeowners can identify signs of wear and tear early on and take necessary action to protect their investment.
One of the main reasons why inspecting roof shingles is essential is to prevent leaks and water damage. Over time, shingles can become damaged or worn, allowing water to seep through and enter your home. This can lead to structural damage, mold growth, and costly repairs. By inspecting your roof regularly, you can catch any issues with your shingles before they cause significant damage.
Another reason why inspecting roof shingles is important is to ensure the longevity of your roof. Shingles that are cracked, curled, or missing can leave your roof vulnerable to further damage. This can result in a reduced lifespan for your roof and the need for premature replacement. By inspecting your shingles, you can identify any damaged or missing shingles and have them repaired or replaced promptly, extending the life of your roof.
Inspecting roof shingles also allows homeowners to spot signs of underlying issues with their roof. For example, widespread erosion of shingle granules can indicate a deteriorating roof, which may require more extensive repairs or a roof replacement. Similarly, curling or buckling shingles can be a sign of poor ventilation or an underlying moisture problem, which should be addressed to prevent further damage.
In summary, inspecting roof shingles is a vital part of roof maintenance and can save homeowners time, money, and headaches in the long run. Regular inspections can help identify signs of wear and tear, prevent leaks and water damage, ensure the longevity of your roof, and uncover any underlying issues that require attention. By taking the time to inspect your roof shingles, you can keep your roof in optimal condition and protect your home for years to come.
Identifying Signs of Wear and Tear on Roof Shingles
Inspecting roof shingles is crucial for maintaining the integrity of your roof and ensuring it lasts for many years. By identifying signs of wear and tear early on, you can address any issues before they become major problems. Here are some key indicators to look for when inspecting your roof shingles:
1. Discoloration: One of the most common signs of wear and tear on roof shingles is discoloration. Over time, shingles can become faded or streaked with different shades. This could be an indication of sunlight damage, algae growth, or moisture accumulation. Discoloration can weaken the shingles and compromise their protective function, so it’s important to address this issue promptly.
2. Granule Loss: Another sign of wear and tear is the presence of loose granules in your gutters or downspouts. Shingles are coated with granules that help protect them from UV rays and provide fire resistance. If you notice excessive granule loss, it may be a sign of aging shingles. Additionally, a roof with sparse granules can make your home more susceptible to leaks and other damage. Regularly check for granule loss to ensure the longevity of your roof.
3. Cracking or Curling: Cracked or curled shingles are a clear indication of wear and tear. Shingles can develop cracks due to age, weather exposure, or improper installation. These cracks allow moisture to seep into the underlying layers of your roof, potentially causing further damage. Similarly, curling shingles can create openings where water can infiltrate. Inspect your roof regularly for any signs of cracking or curling, and replace damaged shingles promptly to prevent leaks and structural issues.
4. Missing Shingles: In addition to cracks and curling, be on the lookout for any missing shingles. Strong winds, storms, or even animal activity can dislodge shingles from your roof. A missing shingle leaves the area vulnerable to water penetration and can compromise the overall stability of the roof. If you notice any gaps in your shingles, consider replacing them immediately to prevent further damage.
Regularly inspecting your roof shingles is an essential part of maintaining your home’s overall well-being. By identifying and addressing signs of wear and tear in a timely manner, you can prevent costly repairs and extend the lifespan of your roof. Remember, when in doubt, it’s always best to consult with a professional roofer to ensure proper assessment and repair.
Examining Shingle Granules for Widespread Erosion
Shingle granules play a crucial role in protecting your roof from the elements, providing a protective layer against water, UV rays, and other external factors. Over time, however, these granules can start to erode, posing a risk to the overall integrity of your roof. Therefore, it is essential to regularly inspect your shingles for signs of widespread erosion.
One of the first signs of shingle granule erosion is the presence of granules in your gutters or downspouts. When the granules start to loosen and detach from the shingles, they can easily wash away with rainwater and accumulate in these areas. Keep an eye out for significant amounts of granules, as this could indicate that your shingles are deteriorating.
To examine the shingle granules more closely, carefully climb a ladder and get a closer look at the surface of the shingles. If you notice areas where the granules are visibly sparse or missing completely, it is a clear sign of erosion. Run your hand lightly over the shingles, feeling for areas with a rough texture or where the granules have dislodged. This can be an indication that the shingles are no longer adequately protecting your roof.
When inspecting for shingle granule erosion, pay attention to the color and overall condition of the granules. If you notice that the granules have faded significantly or appear discolored, it might be a sign that they have been exposed to excessive sunlight or weathering. Similarly, if the granules have a powdery consistency when touched, it could suggest that they have reached the end of their lifespan.
Regularly examining your shingles for widespread erosion is crucial in maintaining the longevity of your roof. If you notice any signs of significant granule loss or deterioration, it is recommended to consult a professional roofing contractor who can provide a thorough assessment and repair any issues before they worsen. By proactively addressing shingle granule erosion, you can ensure the continued stability and protection of your roof for years to come.
Checking for Curling or Buckling Shingles
Curling or buckling shingles are a common problem that homeowners may encounter with their roofs. This issue can lead to water damage, leaks, and a decrease in the overall lifespan of the shingles. Therefore, it is essential to regularly inspect your roof for any signs of curling or buckling shingles to address the problem before it worsens.
One way to check for curling or buckling shingles is to visually inspect your roof from a safe distance. Look for any sections of the roof where the shingles appear to be lifted or have a noticeable curve. Curling shingles may have edges that are turned upwards, while buckling shingles may form ridges or waves across the surface of the roof.
To get a closer look, use a ladder to climb onto the roof and examine the shingles up close. Be sure to take all necessary safety precautions and avoid stepping on the shingles themselves, as this can cause further damage. Instead, carefully walk along the support beams or use a roof harness system if available.
When inspecting the shingles, pay attention to any areas where they appear to be loose or detached from the roof. Use your hand or a tool with a gentle touch to press down on the shingle surface. If it feels soft or spongy, this could indicate moisture damage or decay. Additionally, check for any gaps or separations between the shingles and the underlying materials.
If you notice curling or buckling shingles, it is important to take action promptly. A professional roofing contractor can provide the necessary repairs or replacements to ensure the integrity of your roof. Ignoring this issue can lead to further damage over time, resulting in more extensive and costly repairs.
Regularly can save you from potential roof leaks and water damage. By addressing the problem early on, you can prolong the lifespan of your roof and maintain the overall structural integrity of your home. Don’t forget to schedule regular roof inspections to identify any issues before they escalate.
Detecting Cracked or Missing Shingles
Cracked or missing shingles can be a serious issue when it comes to the health and longevity of your roof. These damaged shingles can compromise the integrity of your roof, leading to leaks and potential structural damage. Therefore, it is crucial to regularly inspect your roof for any signs of cracked or missing shingles.
When inspecting your roof, start by visually scanning the entire surface. Look for any noticeable gaps or areas where the shingles appear to be damaged or missing. Cracked shingles may have visible splits or fractures, while missing shingles will leave behind an empty space where the roofing material should be.
In addition to visual inspection, you can also run your hand over the surface of the shingles. Be cautious while doing this and make sure to wear gloves to protect your hands from any potential sharp edges. Running your hand over the shingles will help you identify any cracked or missing sections that may not be immediately visible to the naked eye.
If you do come across cracked or missing shingles, it is important to address the issue promptly. Ignoring these problems can lead to water penetration, which can cause significant damage to the underlying structure of your roof. It is advised to contact a professional roofing contractor to assess and repair any damaged shingles. They will have the knowledge and expertise to effectively replace cracked or missing shingles and ensure the longevity of your roof.
Taking proactive measures to detect and address cracked or missing shingles will save you from potential costly repairs in the future. By regularly inspecting your roof, you can catch these issues early on and prevent further damage. Remember, a well-maintained roof is essential for protecting your home and everything inside it.
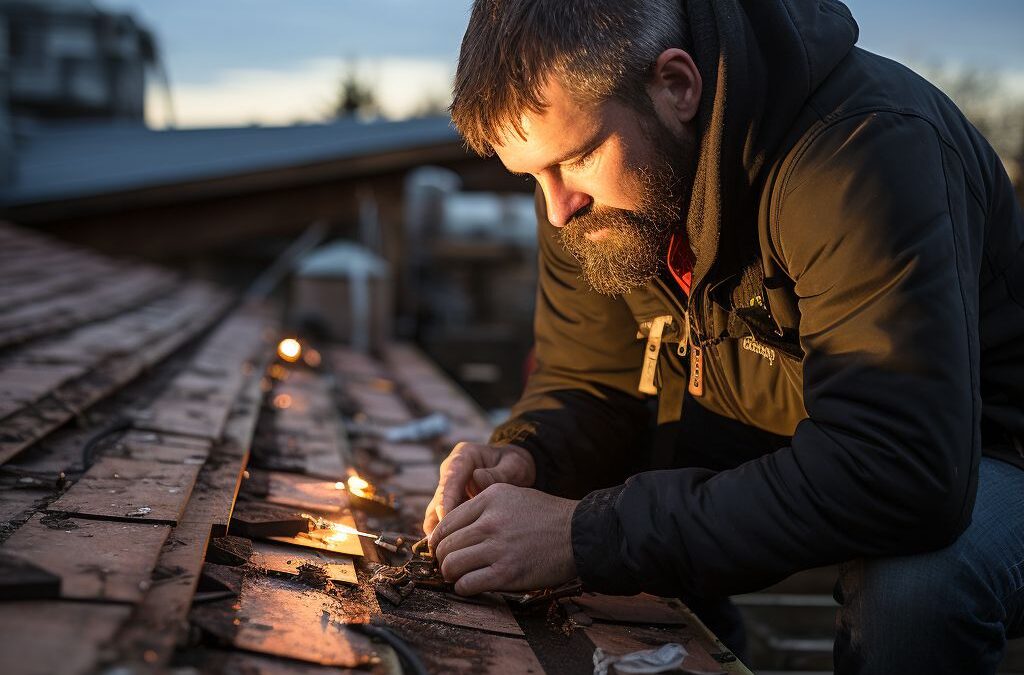
Assessing the Condition of Flashing and Sealants
Inspecting the condition of flashing and sealants is an essential part of roof shingle inspection. Flashing refers to the metal pieces that are used to waterproof and protect sections of the roof where shingles meet other materials such as chimneys, vents, or skylights. Sealants, on the other hand, are applied to seal any gaps or joints in the roofing system to prevent leaks and further damage. By , you can ensure the overall integrity of your roof and address any potential issues before they worsen.
To assess the condition of flashing, start by visually inspecting the areas where the flashing is located. Look for signs of rust, corrosion, or any visible damage. Pay close attention to any areas where the flashing is loose or appears to be pulling away from the roof surface. These could be potential entry points for water and should be addressed promptly.
In addition to a visual inspection, run your hand along the flashing to check for any gaps or spaces between the flashing and the roof surface. Gaps or spaces can indicate that the flashing has become loose or that the sealant has deteriorated. This can lead to water intrusion and should be repaired as soon as possible.
Moving on to sealants, carefully examine the areas where sealant is applied, such as around vents, chimneys, or skylights. Look for any cracks or gaps in the sealant, as these can allow water to seep in and cause damage. In some cases, sealant may have dried out or become brittle over time, which can also compromise its effectiveness. If you notice any issues with the sealant, it’s important to reseal these areas as soon as possible using a high-quality roofing sealant.
By thoroughly inspecting the condition of flashing and sealants, you can identify any potential weaknesses in your roofing system and take appropriate measures to prevent water damage and extend the lifespan of your roof. Regular inspections and maintenance can help you catch these issues early on and avoid costly repairs down the line. Remember, when it comes to roof shingle inspections, paying attention to the details can make all the difference in maintaining a durable and leak-free roof.
People Also Ask
1. How do you inspect roof shingles for damage?
To inspect roof shingles for damage, start by examining the overall condition of the shingles, checking for cracks, curling, or missing pieces. Look for signs of wear like granule loss, moss or algae growth, or blistering. Additionally, inspect the roof for any leaks or water stains on the ceiling.
2. How often should you inspect roof shingles?
It is recommended to inspect your roof shingles at least once a year, preferably during the spring or fall. Regular inspections can help detect any early signs of damage or wear, allowing for timely repairs or maintenance to prevent further issues.
3. What are the signs of damaged roof shingles?
Signs of damaged roof shingles include cracked, curled, or missing shingles, granule loss, moss or algae growth, or blistering. Additionally, water leaks or stains on the ceiling can indicate roof damage. It’s important to address any signs of damage promptly to avoid more extensive problems.
4. Can you inspect roof shingles without climbing onto the roof?
While it’s best to inspect roof shingles by physically climbing onto the roof, it is possible to inspect them from the ground using binoculars. Look for any visible signs of damage, such as cracked, curled, or missing shingles, and check for discoloration or areas of moss or algae growth.
5. When should you hire a professional to inspect your roof shingles?
If you are unsure about inspecting your roof shingles or if you notice significant damage, it’s wise to hire a professional roofing inspector. They have the knowledge and experience to thoroughly assess the condition of your roof and identify any potential issues that may require repairs or replacement.
In Retrospect
In conclusion, inspecting roof shingles is an important task for every homeowner to ensure the longevity and effectiveness of their roof. By following the steps outlined in this guide, homeowners can identify any potential issues with their roof shingles and take appropriate action to address them. Regular inspection and maintenance can help prevent costly repairs and extend the lifespan of the roof. It is recommended to inspect the roof shingles at least once a year or after severe weather events. By taking the time to inspect roof shingles, homeowners can protect their investment and maintain the overall integrity of their home.

Lead Roofing Specialist
Michael Thompson brings over two decades of roofing expertise to Fresno Roof Repair. His dedication to quality craftsmanship and customer satisfaction has earned him a reputation as a reliable authority in the roofing industry.