Are you a proud owner of an enclosed trailer? These versatile vehicles are essential for transporting goods or equipment securely. However, over time, the roof of your trailer may develop leaks or signs of wear and tear, which can compromise the safety of your cargo. Fortunately, repairing a trailer roof is not as daunting as it may seem. In this article, we will guide you through the step-by-step process of repairing your trailer roof?”>enclosed trailer roof, ensuring that your valuable items remain dry and protected during each journey. So, grab your tools, roll up your sleeves, and let’s get started on restoring the integrity of your trailer’s roof!
Assessing the Damage: Identifying Common Roof Issues in Enclosed Trailers
When it comes to repairing an enclosed trailer roof, the first step is to assess the extent of the damage. Identifying common roof issues will help you determine the best course of action and the materials you will need for the repair. By thoroughly inspecting the roof, you can ensure that you address all the underlying problems and prevent further issues down the road.
One common problem that can occur is leaks in the roof. These can be caused by various factors such as age, wear and tear, or improper installation. Look for areas where water might be seeping through, such as cracks or gaps in the roof seams, around vents, or near any openings. Water stains on the ceiling or walls inside the trailer are also indicative of a leaky roof.
Another issue you might encounter is structural damage. This can include sagging or uneven areas on the roof, weakened or rotting wood, or loose fasteners. These problems can compromise the integrity of the roof and lead to further damage if not addressed promptly.
During your assessment, it is important to also check for signs of mold or mildew. These can be an indication of water damage or poor ventilation, which need to be addressed before repairing the roof. Mold or mildew growth can not only cause health issues, but it can also weaken the roof structure over time.
By thoroughly assessing the damage, you can determine the scope of the repair and the necessary materials and tools needed. Whether it’s patching a leak, reinforcing weak points, or addressing structural damage, accurately identifying the issues will ensure that your enclosed trailer roof repair is effective and long-lasting.
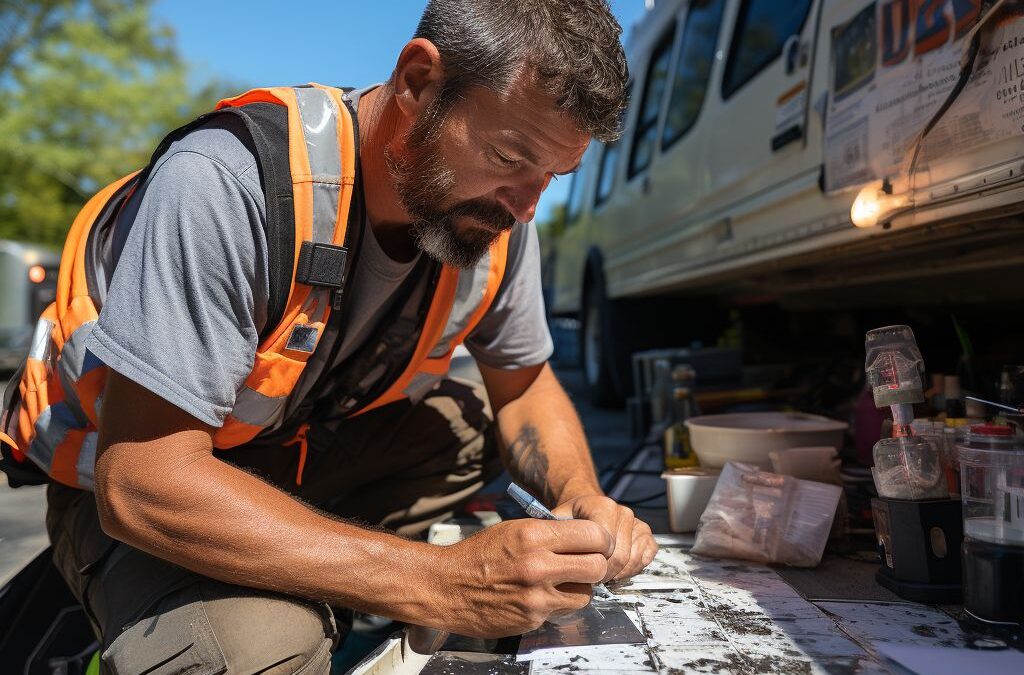
Materials and Tools You’ll Need for Repairing Your Enclosed Trailer Roof
In order to effectively repair your enclosed trailer roof, it is essential to have the right materials and tools on hand. This will ensure that you are able to properly address any issues and restore the integrity of your roof.
To begin, you will need to gather a few key materials. One of the most important items is a high-quality roofing sealant or adhesive. Look for a product that is specifically designed for use on metal, as this will provide the best results for your enclosed trailer roof. Additionally, you will need a roll of roofing tape or patching material to cover any holes or cracks.
In terms of tools, you will need a few basic items to complete the repair process. A ladder or step stool will be necessary to safely access the roof. You will also need a wire brush or sandpaper to clean the surface of the roof before applying any sealant or patching material. Additionally, a putty knife or scraper will be useful for spreading the sealant and smoothing out any rough patches.
If your repair job involves more extensive structural damage, you may need some additional tools such as a drill, screws, and metal reinforcements. These tools will allow you to reinforce weak points in the roof and provide added stability.
By ensuring that you have the right materials and tools on hand, you will be well-prepared to tackle any issues that arise with your enclosed trailer roof. Remember to follow safety precautions and take your time to ensure that the job is done correctly. In the next section, we will provide a step-by-step guide to patching leaks in your enclosed trailer roof.
Step-by-Step Guide to Patching Leaks in Your Enclosed Trailer Roof
:
If you’ve noticed a leak in your enclosed trailer roof, it’s important to take immediate action to prevent further damage. Here’s a step-by-step guide on how to patch leaks in your trailer roof and keep it in top condition.
First, start by locating the source of the leak. Inspect the interior of your trailer for any signs of water damage, such as discoloration or dampness. Once you have identified the area, climb up on the roof and carefully remove any debris or obstructions that may be causing the leak.
Next, clean the area around the leak thoroughly. Use a mild detergent and water to remove any dirt or grime that may prevent proper adhesion of the patch. Rinse the area and allow it to dry completely before proceeding.
Now, it’s time to apply the patch. Depending on the size of the leak, you can use either a patch kit or a sealant specifically designed for trailer roofs. Follow the manufacturer’s instructions carefully, ensuring that the patch covers the entire affected area and extends at least a few inches beyond the leak.
If you are using a patch kit, cut the patch to the appropriate size and shape. Apply a generous amount of adhesive to the back of the patch and press it firmly onto the roof, smoothing out any air bubbles or wrinkles. If you are using a sealant, apply it directly to the leaky area, using a putty knife to spread it evenly and create a watertight seal.
Once the patch or sealant has been applied, allow it to dry completely before exposing your trailer to any moisture. This may take a few hours or overnight, depending on the product used.
Finally, inspect the patched area regularly to ensure it remains intact and watertight. If you notice any signs of additional leaks or damage, address them promptly to prevent further issues.
By following this step-by-step guide, you can effectively patch leaks in your enclosed trailer roof and ensure its longevity and functionality for years to come. Remember to always prioritize safety when working on your trailer roof and seek professional assistance if necessary.
Repairing Structural Damage: Reinforcing Weak Points in the Roof
Reinforcing weak points in the roof of your enclosed trailer is crucial to ensure its longevity and prevent further damage. Over time, the roof of your trailer can develop weak spots due to wear and tear, environmental factors, or even accidents. By reinforcing these weak points, you can prolong the lifespan of your trailer and avoid costly repairs down the line.
To begin reinforcing weak points in the roof, you’ll need a few materials and tools. Firstly, make sure you have a ladder that allows you safe and easy access to the roof. You’ll also need a tape measure and a marker to accurately measure and mark the weak areas. Additionally, gather a good quality roof sealant, roofing screws, a screwdriver or drill, and a roll of self-adhesive roofing fabric.
Start by thoroughly inspecting the roof to identify any weak points or areas that need reinforcement. These weak spots may include loose or damaged seams, punctures, or areas where the roof may sag or show signs of structural weakness. Once you’ve identified these areas, measure and mark them to ensure precise reinforcement.
Next, using a screwdriver or drill, secure the weak points with roofing screws. Make sure to use screws specifically designed for roof repair to ensure proper stability and longevity. For added reinforcement, apply a layer of roof sealant over the screws to prevent any water leakage. This will help protect the structural integrity of the roof and prevent any further damage.
For areas with larger weak spots or holes, it may be necessary to use self-adhesive roofing fabric. Cut the fabric to the appropriate size and apply it over the weak areas. Press it firmly to ensure proper adhesion. This fabric acts as an extra layer of protection against leaks and helps reinforce the damaged portions of the roof.
Once you’ve reinforced the weak points in the roof, perform a final inspection to ensure everything is securely in place. Pay close attention to any edges or seams that may require additional reinforcement. By reinforcing the weak points in your enclosed trailer’s roof, you’ll add strength and durability to extend its lifespan and protect your cargo.
Remember, regular maintenance and inspections are essential to prevent further damage to your enclosed trailer’s roof. Keep an eye out for any new weak points or signs of deterioration, and address them promptly to avoid costly repairs in the future. With the proper maintenance and reinforcement, your enclosed trailer will continue to serve you well for years to come.
Preventing Future Damage: Proper Maintenance for Your Enclosed Trailer Roof
To ensure the longevity and durability of your enclosed trailer roof, it is crucial to practice proper maintenance techniques. By following these simple steps, you can prevent future damage and minimize the need for costly repairs.
Regular Cleaning:
Regularly cleaning your trailer roof is essential to prevent the accumulation of dirt, debris, and other elements that can cause damage over time. Use a soft-bristle brush or broom to gently sweep away any loose dirt or leaves. For tougher stains or grime buildup, mix a mild detergent with water and scrub the affected areas using a non-abrasive sponge or cloth. Rinse the roof thoroughly with clean water and allow it to dry completely before storing or using the trailer.
Check for Leaks:
Even if you have repaired any existing leaks in your enclosed trailer roof, it is important to regularly check for new ones. Inspect the roof after heavy rainfall or at least once every few months to ensure there are no signs of water penetration. Look for any discolorations or dark spots on the ceiling, as these may indicate the presence of a leak. Additionally, pay attention to any unusual odors or musty smells, as they can be a sign of water damage.
Seal and Caulk:
Proper sealing and caulking are vital in preventing future damage to your enclosed trailer roof. Inspect all seams, joints, and connectors regularly and ensure that they are tightly sealed. Use a high-quality roof sealant or caulk specifically designed for trailer roofs and apply it to any areas where you suspect a potential leak or weak spot. Be sure to follow the manufacturer’s instructions for application and allow sufficient curing time before exposing the roof to moisture.
Regular Inspections:
Performing regular inspections of your enclosed trailer roof can help identify any potential issues before they become major problems. Check for loose or missing screws, bolts, or fasteners and tighten or replace them as necessary. Examine the roof vents, skylights, and any other protrusions for any signs of wear or damage. Promptly address any minor issues you come across to prevent them from escalating into major repairs.
By following these preventive maintenance tips, you can keep your enclosed trailer roof in excellent condition and avoid costly repairs down the line. Remember, regular cleaning, checking for leaks, sealing and caulking, and performing routine inspections are key to maintaining a durable and long-lasting roof for your trailer.
People Also Ask
1. How do I determine the extent of the damage to an enclosed trailer roof?
To determine the extent of the damage, inspect the roof thoroughly for any visible signs such as cracks, leaks, or sagging. Additionally, check the interior of the trailer for water stains or mold, as these are indications of roof damage.
2. What materials are suitable for repairing an enclosed trailer roof?
Suitable materials for repairing an enclosed trailer roof include EPDM rubber, fiberglass, aluminum, or PVC. The choice of material depends on personal preference, budget, and the severity of the damage.
3. Can I repair a small puncture in the enclosed trailer roof myself?
Yes, small punctures in the enclosed trailer roof can be repaired using patch kits specifically designed for the type of roofing material used. Follow the manufacturer’s instructions carefully to ensure proper repair.
4. How can I seal leaks in the enclosed trailer roof?
To seal leaks in the enclosed trailer roof, apply a suitable sealant specifically designed for the roofing material. Clean the area thoroughly, apply the sealant evenly, and ensure it covers the entire damaged area to prevent further leaks.
5. Can I reinforce a sagging roof in my enclosed trailer?
Yes, you can reinforce a sagging roof in an enclosed trailer. This can be done by adding additional support beams or braces to strengthen the structure and prevent further sagging. Consult a professional if you are unsure about the best method for reinforcing your specific trailer model.
Key Takeaways
In conclusion, repairing an enclosed trailer roof is a manageable task that can be accomplished by following a few simple steps. Begin by assessing the extent of the damage and identifying the type of roofing material used. Next, gather the necessary tools and materials, and carefully remove any damaged or deteriorated sections of the roof. Apply a suitable roofing sealant or patching compound to the affected areas, ensuring a watertight seal. Finally, conduct regular inspections and maintenance to prevent future damage and extend the lifespan of the roof.
Remember, safety is paramount throughout the repair process, so always use appropriate safety equipment and take necessary precautions. By following these steps and remaining diligent in your maintenance efforts, you can effectively repair and maintain your enclosed trailer roof, ensuring its longevity and functionality.
If you have any doubts or lack experience, it may be best to consult a professional for assistance. They can provide valuable guidance, offer specialized knowledge, and ensure that the repairs are carried out with the highest level of precision and expertise. Happy repairing!

Innovation and Technology Director
William Simmons is dedicated to bridging the gap between innovative roofing technologies and traditional craftsmanship. His focus on blending modern techniques with reliable practices ensures optimal results for our clients.